Video conferences are one of the most important ways to build relationships and organize political and social movements with others across the US and around the world. Jitsi is a free open source video conferencing tool that works on any computer. It does not require setting up an account or paying a monthly fee. By contrast, Zoom charges an annual fee that runs from $150 for a single user to $250 a year for a business. With Jitsi, you can add any number of people to your video conference and you can run your video conference for several hours for free rather than the 40 minute time limit imposed by the Zoom free account.
Why Jitsi is much more secure than Zoom
The biggest advantage of Jitsi is that it is dramatically more secure than Zoom. This is because moderators and participants do not need to download any “apps” to use Jitsi. Just open any web browser and go to your Jitsi video conference room. By contrast, to use Zoom, you need to download a closed source (and therefore insecure) Zoom app which has a file size greater than 142 MB. Extract the largest file and click on Properties for the two folders to see that the opt folder has 1,362 files and a total file size of 523 MB. Recently, Zoom increased the file size to over 800 MB. This means that Zoom is actually larger that the Linux operating system and about 8 times larger than a draconian Deep State program called UEFI – which itself is capable of remotely bricking any Windows or Apple computer.
To give you an idea of how large 800 MB is, the classic book called Moby Dick has 213,533 words divided over about 400 pages. It has a file size of about 1 megabyte. Thus the Zoom app is the equivalent of more than 800 copies of Moby Dick or more than 300,000 pages of code! Zoom has never explained what all the millions of lines of code actually do.
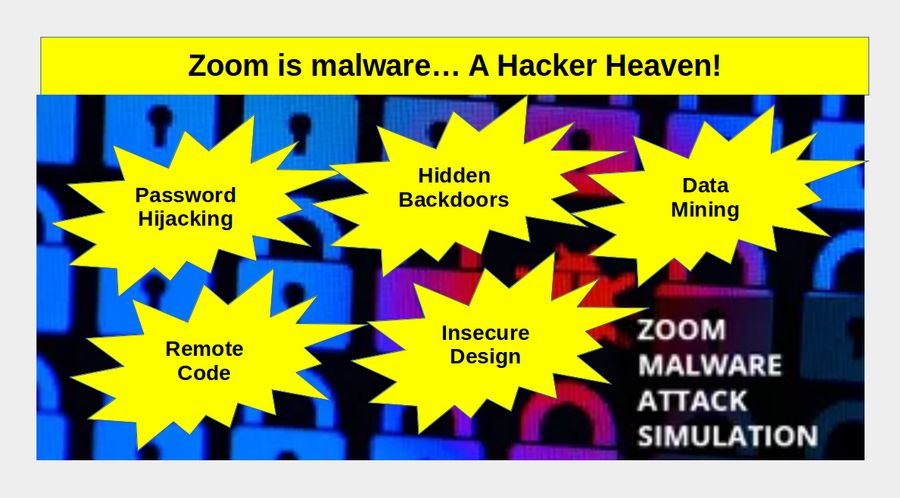
But the worst part is that nearly all of this code is hidden. It is not open source. It is not subject to an independent inspection or audit. This makes the Zoom app one of the worst pieces of malware ever written.
Requiring your participants to each download this app and placing it on their computer not only places your computer at risk – but also the computers of all of your students. Thus, even if Zoom was free, you should not use it or force others to use it.
By contrast, the code for Jitsi is entirely open source and therefore subject to public audits. These audits can and do confirm that there are no hidden back doors in any Jitsi programs. In addition, the file size for Jitsi as shown on their GitHub page is 135 MB meaning that it is only about 20% of the size of Zoom
Security researchers have called Zoom “a privacy disaster” and “fundamentally corrupt”. Arvind Narayanan, an associate computer science professor at Princeton University stated: “Let’s make this simple. Zoom is malware.”
Zoom has falsely advertised itself as using end-to-end encryption, a system that secures communication so that it can only be read by the users involved, a report from the Intercept found. Zoom confirmed that end-to-end encryption was not currently possible on the platform.
"We discourage the use of Zoom at this time for use cases that require strong privacy and confidentiality," the Citizen Lab report says, such as "governments worried about espionage, businesses concerned about cyber crime and industrial espionage, healthcare providers handling sensitive patient information" and "activists, lawyers, and journalists working on sensitive topics."
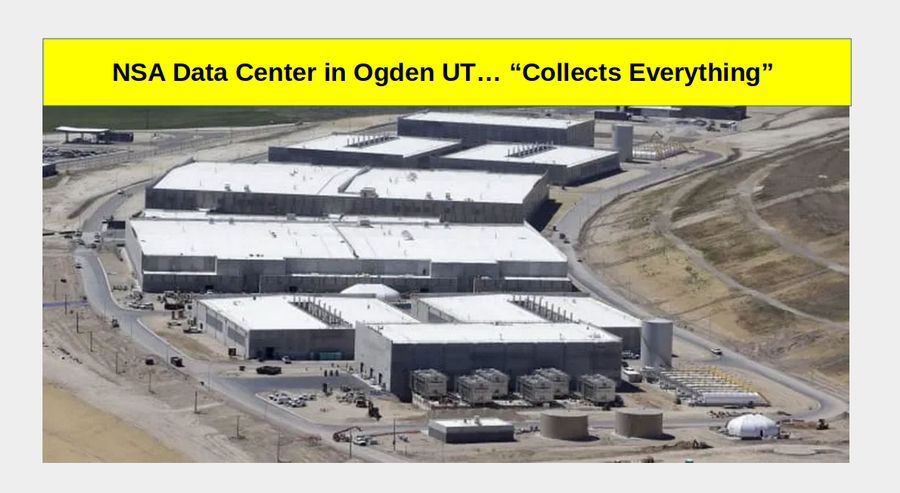
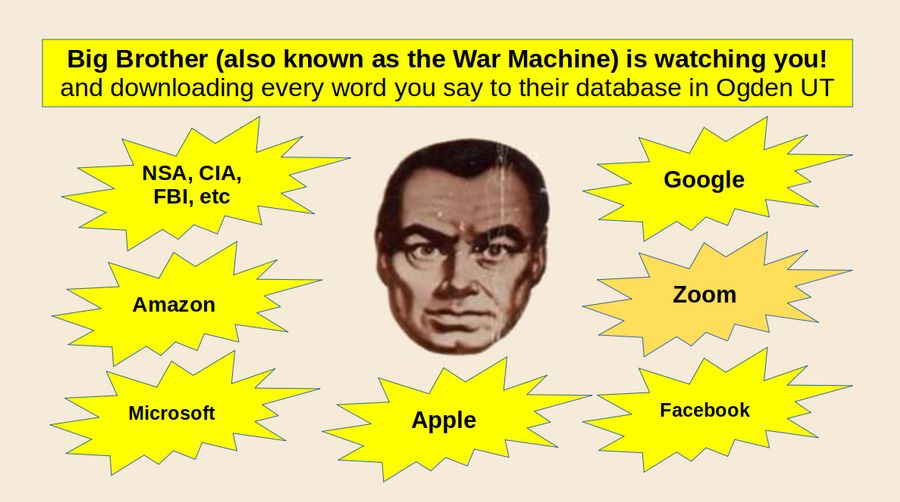
Given the NSA policy to “Collect Everything,” any Zoom video conference is almost certain to wind up in the NSA Database in Ogden UT.
In 2018, the Federal Trade Commission announced that Zoom "misled users" and "engaged in a series of deceptive and unfair practices" regarding its own security. The FTC cited the fake end-to-end encryption uncovered in March and software that Zoom installed on Macs without authorization.
In 2019, it was revealed Zoom had quietly installed a hidden web server on user devices that could allow the user to be added to a call without their permission
In 2020, a bug was discovered that enables hackers to take over a Zoom user’s Mac, including tapping into the webcam and hacking the microphone. A report from Motherboard found Zoom sends data from users of its iOS app to Facebook for advertising purposes, even if the user does not have a Facebook account.
In 2021, Zoom flaws flaws allowed remote code execution — where hackers could remotely take over computers with Zoom installed. Two researchers demonstrated at the Pwn2Own contest that they could remotely take over Windows PCs and Macs by using at least one previously unknown vulnerability in the Zoom desktop application.
In 2022, CERT-In (the Indian Computer Emergency Response Team) has identified several vulnerabilities in Zoom. While one of the vulnerabilities can allow an unauthorized remote attacker to join a Zoom meeting, another could allow a remote hacker to download audio and video from meetings they aren't authorized to join if exploited.
In January 2023, usernames and passwords for more than 500,000 Zoom accounts were being offered for sale and even being given away in criminal marketplaces on the Internet.
In April 2023, researchers from IngSights discovered a set of 2,300 Zoom login credentials being shared in a criminal online forum. "Aside from personal accounts, there were many corporate accounts belonging to banks, consultancy companies, educational facilities, healthcare providers, and software vendors, among others," IntSight's Etay Maor wrote in a blog post.
Forcing anyone to download this massive malware places anyone using Zoom at a great risk of hacking – to say nothing about the risk of invasion of privacy.
Now that we know some of the benefits of Jitsi, let’s see how easy it is to use.
Try Jitsi Now
To see how easy it is to use Jitsi, just open any browser and go to meet.jit.si where you will see this screen:
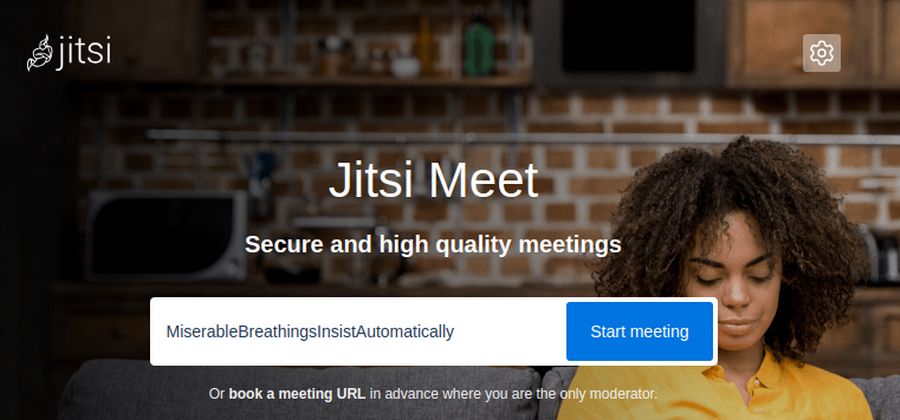
Type a unique name with no spaces into the white box, such as Try-Jitsi-Now. Then click Start Meeting to see this popup:
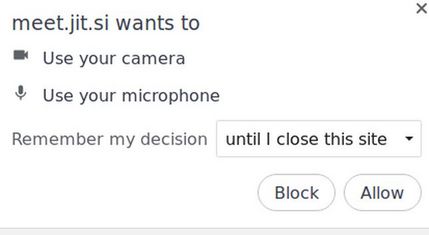
Click Allow which brings up this screen:
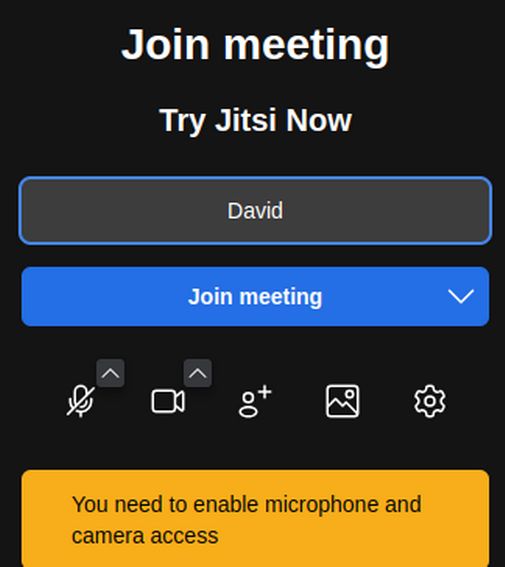
Click on the Microphone icon to turn on your microphone. If you want to start the meeting with your camera off, click the camera to turn it off. Type in the name you want to use during the meeting. Then click Join Meeting which brings up this screen:
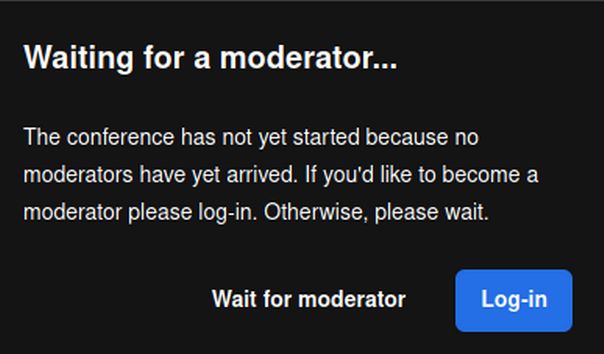
To actually create a new video conference session, click Log in which brings up this screen:
Sadly, Jitsi recently started requiring those setting up Jitsi meeting to first sign in using a Google, Facebook or GitHub (Microsoft) ID. This new policy makes it impossible to hold a private and secure meeting with the free version of Jitsi Meet because Google, Facebook and Microsoft all have a long history of data mining. But just to see what Jitsi is like, if you have any of these accounts, go ahead and use it to sign in. There will be several icons hidden at the bottom of the screen that become visible when you hover over them:

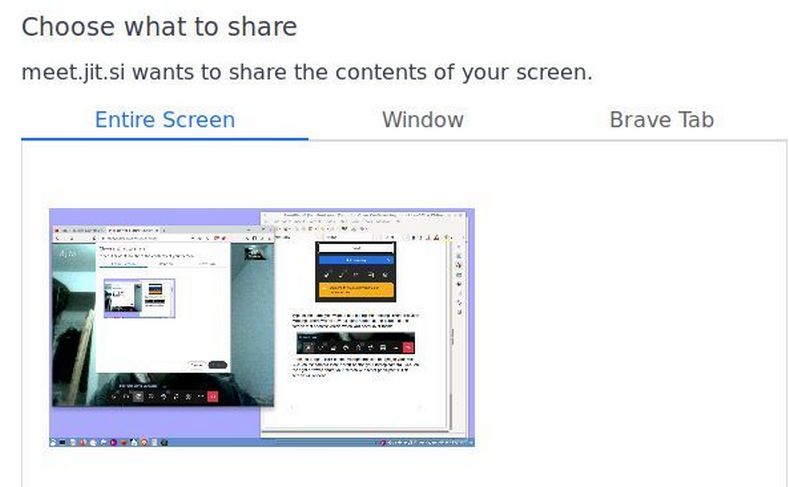
From left to right, click on the Microphone icon to unmute your Mic. Click on the Camera icon to start or stop your laptop camera. Click on the Right arrow to share your screen with other participants. This screen will appear:
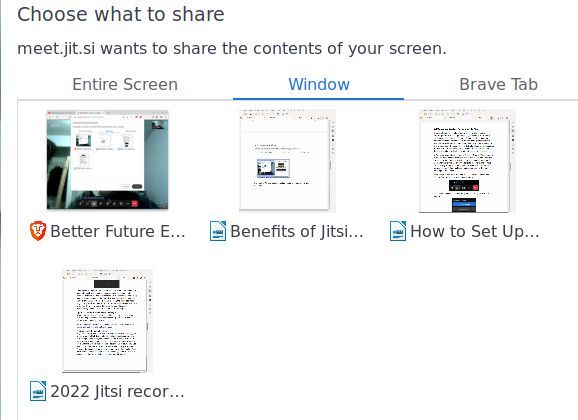
Click on the Window tab to select another web browser or document.
Click on the Brave tab to select any other browser tab:
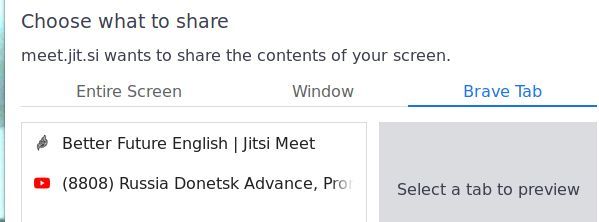
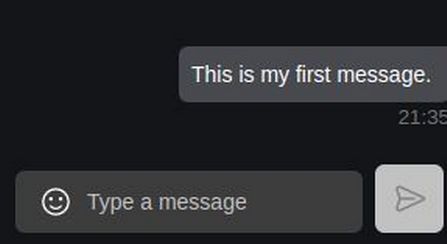
Click Cancel to return to the main screen. Click on the Message icon to open a Message box for Participants to ask questions or provide information.
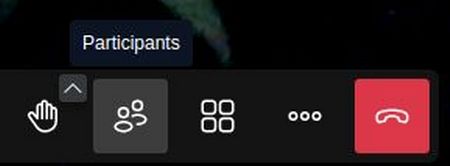
Click on the Raise Hand box to indicate that you have something you would like to say to the group. Click on the Participants box to see a list of Participants and also to create one or more Breakout rooms:
Note: I explain how to use Breakout rooms at the end of this article.
Click on the Grid View icon to display all users in equal sized boxes.
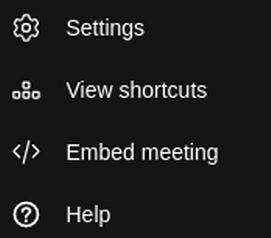
Click on the Three dots to see More Actions and open the Jitsi Settings panel. The settings panel is divided into three areas.
Here is the top area:
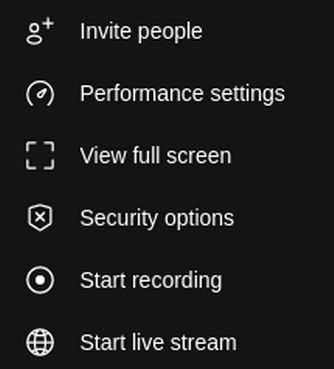
You can invite people to your conference just by copying the URL. Or click Invite People to see more options. (Thankfully, those you invite will not have to sign in with a data mining corporation to attend your video conference).
Security options allows you to add a password required to access the video conference. Start Recording allows you to create a recording of your video conference. However, the built in Jitsi recorder tool has a lot of problems. I have therefore written a separate article explaining how to record a Jitsi video conference with a free open source tool called Simple Screen Recorder. Here is the second Settings section:
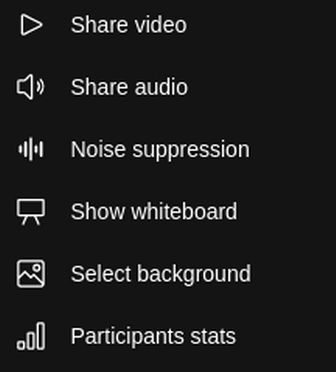
I recommend sharing a video simply in a separate browser tab. Here is the third settings area:
Click Settings to see this screen:

The first setting screen, Audio Settings, allows you to change microphones. Click Video settings.
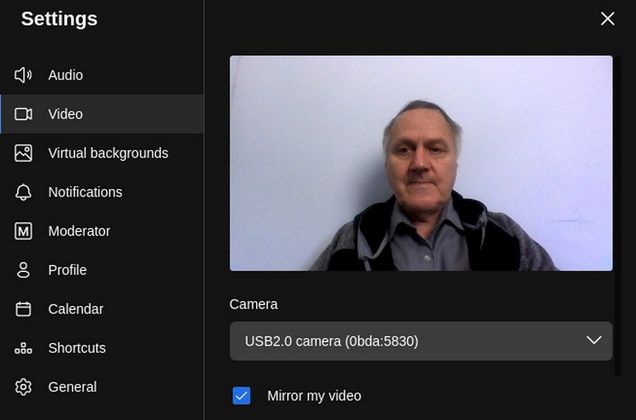
This screen allows you to change your camera if needed.
You can see that Jitsi is extremely easy to use. The real question is why would anyone pay hundreds of dollars to use an insecure tool like Zoom when they can use a secure video conference tool like Jitsi for free?
How to Set up break out rooms for Jitsi class sessions
Breakout Rooms let you temporarily split your Jitsi meeting into smaller groups, with each group meeting in its own unique video conference room. By using Breakout Rooms, a Moderator can separate meeting participants into several small groups for more focused conversations and then bring them back into the main room at any time. Each Breakout Room is distinct and completely separate from other rooms and the main room in terms of audio and video, so there is no audio or video leak or interference between rooms.
In Jitsi, only Moderators can create Breakout Rooms. The moderator is the first person in the video conference room. The moderator can create break out rooms at any time before or during a meeting. The Moderator can either assign participants to specific rooms or have participants join rooms on their own.
Currently, users can move between rooms without restriction and can go back to the main meeting room at any time. To create your first Breakout room, start a Jitsi video conference and click on Participants icon in the bottom menu.
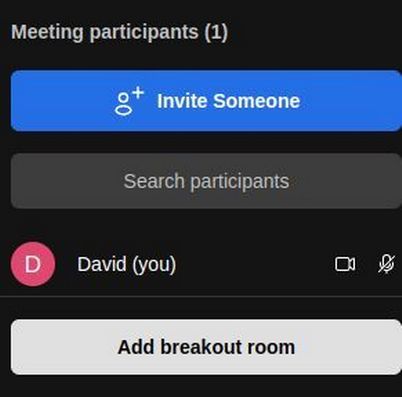
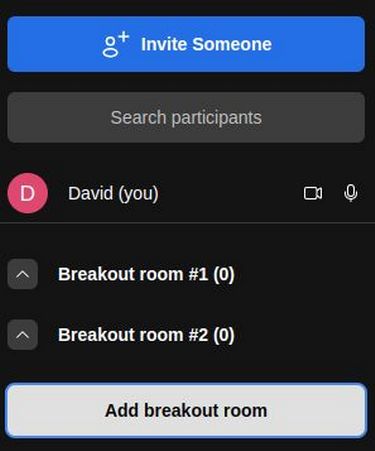
This opens the hidden Participants panel on the right side of the screen:
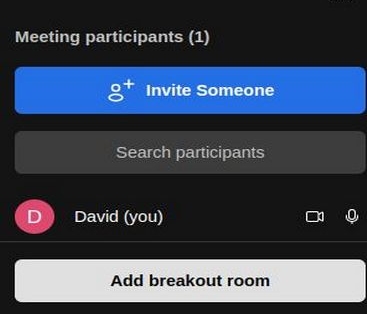
Click Add breakout room to add a room called Breakout Room 1.
Click again to add Breakout Room 2:
To put participants in a breakout room, they first have to join the main meeting. But you can practice moving to and from a breakout room even if you are the only person in the video conference. Simply hover your cursor to the right of Breakout room 1 and click the Join button.
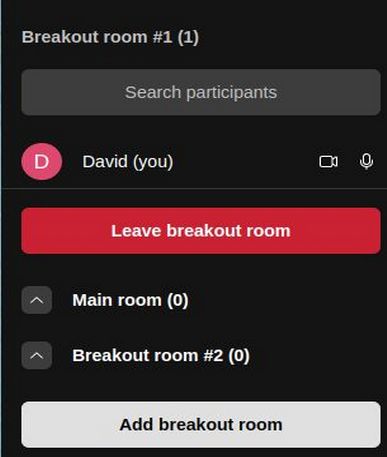
If you click on Leave Breakout room, you return to the main room. You can also click the blue Join button to the right of the Main Room. To move to a Breakout room, click on the Join button for that room.
How to move a participant to a breakout room
If you are the moderator, you can move a meeting participant to a Breakout Room by clicking on the three dots to the far right of the participant’s Display Name and then selecting the specific Breakout Room to move them to.
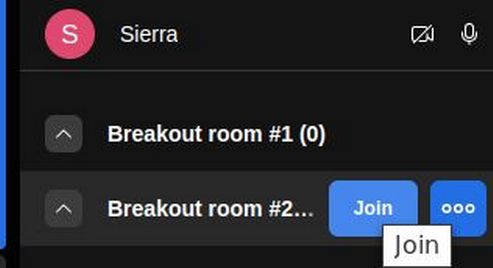
Alternatively, a participant can choose to join a Breakout Room on their own once a Breakout room has been created by clicking on the ‘Join’ button next to the listed Breakout Room:
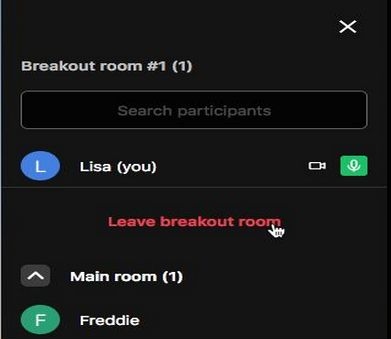
Participants can leave a Breakout Room at any time and be taken back to the main room:
The Moderator is able to see all the Breakout Rooms and the participants in the rooms at any time. If you as the moderator are in the main room and close a breakout room, any participants in that room are returned to the main room.
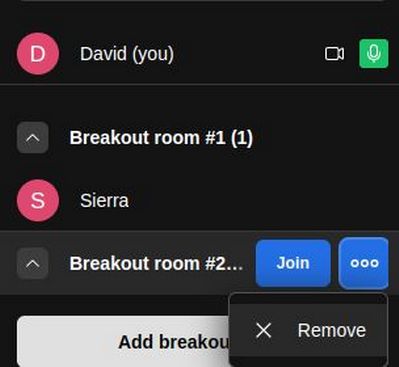
If a Breakout Room is empty, the Moderator can completely remove the room from the available list of Breakout Rooms by clicking on the three dots to the right of the room and clicking Remove.
Limitations of Jitsi Breakout Rooms
There are a few limitations of Jitsi Breakout rooms. First, room names are not editable or configurable. Second, the Moderator has to be in the same room to access the context menu to a user using the ellipsis (three dots) to move the participant to another room.
If the Moderator is in a Breakout room, to close the room, the Moderator first needs to exit the Breakout room (join another Breakout room or go back to the Main room). Finally, in a password-protected meeting, participants will need the password to get back into the Main Room after going to a Breakout Room. Breakout Rooms can also be individually password-protected.
Using SSR to Record a Jitsi Video Conference
It is possible to use Jitsi’s internal video recorder to record a video of your Jitsi meeting and then download the video to your home computer and or Google Drive account to share with others. Unfortunately, the Jitsi Start Recording button does not appear in Firefox. You will therefore need to use some version of the Google Chrome browser, for example Chromium or Brave. With these browsers, the Start Recording button will appear just above the Live Recording button and just below Security options.
You should definitely practice making short recordings before making the real thing as there are several problems that may crop up. The first problem is that there is a time limit on how long the Jitsi Built in recorder will record. It is about 90 minutes. So if your class runs longer than that, you will need to stop the video and download it and start a new video. The second problem is screen sharing. The recording appears to be limited to recording just the main Jitsi screen. If you try to share a different screen or switch between shared screens, the recording will turn itself off without warning.
The third problem is that the Jitsi video recorder does not offer a way to precisely control the width to height ratio of the recording. Ideally, we want the video to be a 16 wide by 9 high ratio to display on YouTube, BitChute and or other video sharing platforms. The fourth problem is that to actually download the video, you first need to click on Stop Recording. A popup will appear where you can choose the folder in your file manager where you want to save the video. Currently, the video will only save as a WebM video. While this format can be converted to an MP4 format if needed, it is still a hassle and may result in a lower quality video or increased file size.
I am therefore not a fan of the built in Jitsi recording system because it takes your focus as a teacher away from what you are teaching and because you can not record different windows such as viewing a Writer document, then watching a YouTube video. Also I often teach courses in a two hour block so 90 minute time limit may not work. Finally, I think it is more practical to simply record an MP4 video in the first place. Both the sound quality and file size should be better. This is especially true if you want to directly upload class videos to a course YouTube channel or BitChute channel for students to review.
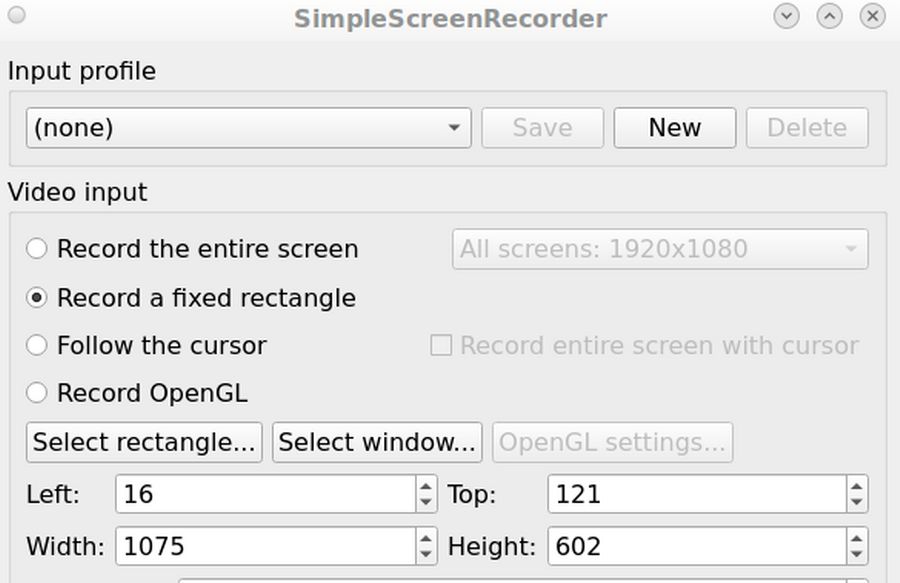
I therefore recommend using an independent free open source video screen recording program called Simple Screen Recorder or SSR instead of the Jitsi built in tool. If you are using a Linux laptop, you can download Simple Screen Recorder from the Software Center. You can then set SSR up to record a fixed area on your laptop. First start a Jitsi session and place it in the upper left corner of your laptop screen so that it takes up about two thirds of the width and two thirds of the height. Then open SSR and click Select Rectangle to select the area of your Jitsi window. Below SSR is set to record a specific rectangle which is 1075 pixels wide by 602 pixels high. This results in a screen ratio of 16 by 9 or 1.78 - which is the best ratio for a YouTube or BitChute video.
By the Jitsi video conference being in a web browser that takes up about two thirds of your laptop screen, you can use the other third of your laptop screen to see and share a Writer document or other browser or any other window. I have provided complete instructions on how to use Simple Screen Recorder at this link:
https://createabetternetwork.com/6-promote-your-network/6-2-create-and-post-informational-videos
If using a Writer document, have it open to the right of the Jitsi browser window. If also watching a YouTube video – or referring to another website or web page, have these open in another browser. Set the Desktop background for a solid color and open a calculator above the Simple Screen recorder window to check the selected rectangle ratio. Set your laptop on a small stand so that your eyes are about the same level as your laptop camera rather than looking down at your laptop camera. If you want to hear student voices, changing the sound option to Built in analog stereo should be used rather than using a USB headset microphone. Then click Continue. Change the container to MP4 and name the video test1. Then click Continue. We are now ready to start the video conference.
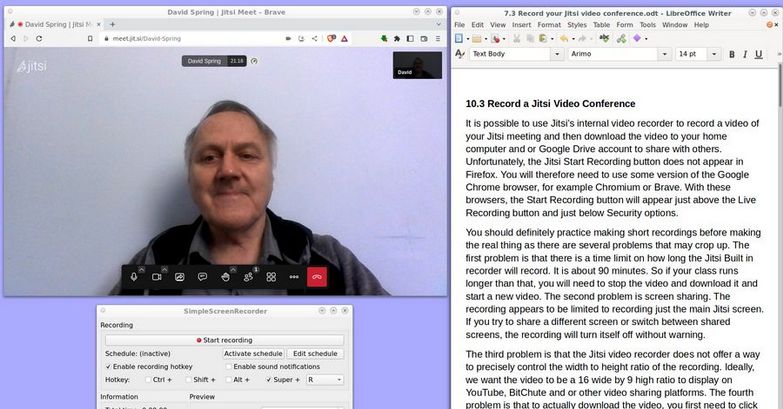
Here is my complete desktop just before starting the video recording. Note that the Simple Screen Recorder window with the Start Recording button is underneath the Jitsi browser window and I am ready to switch to a Writer document:
Practice switching back and forth between the Jitsi window and the Writer window. Then start the Jitsi conference and explain to students that the recording will begin in a moment. Once all students have arrived and are in their proper places, click Start Video in the SSR control panel.
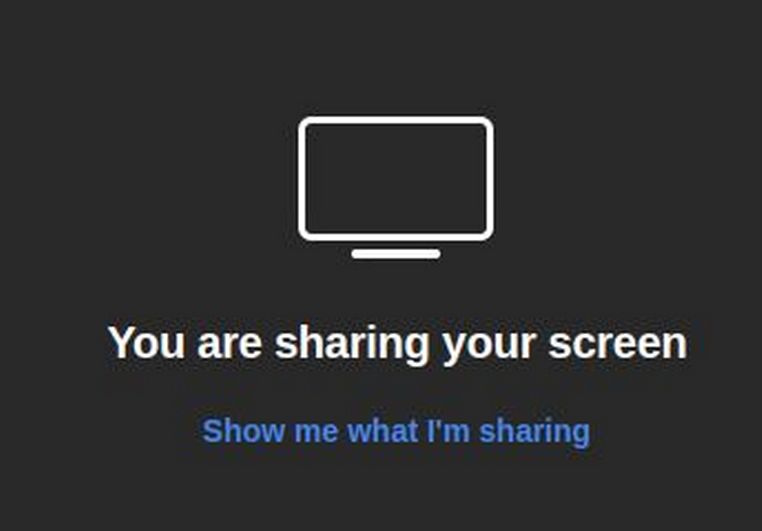
Practice sharing documents and videos. Keep in mind that whatever is shown on the desktop rectangle is what will be recorded. It is helpful to also share this in the video conference. After you start sharing a screen, select the box in Jitsi (it looks like a new participant) and then click Show me what I am sharing:
To remove the shared screen, click on Stop Sharing. This places the moderator back in the main screen where you can share another screen if you wish.
Students can also share their screens and as long as their screen appears in the main Jitsi box, student screens will be shared. If you want to record a breakout room, the moderator needs to go to that Breakout room to record it.
When the video conference is over, stop the video by right clicking on the SSR icon in the lower right corner of your laptop task bar. Then click Save Recording.
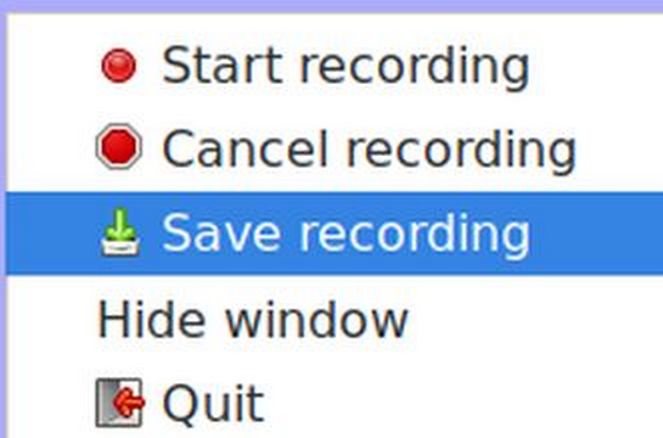
This will automatically save the video to your home file manager.
Optional… Edit the video before posting it
If you need to crop any sections out of the video, that can be down with a free open source video editor called Open Shot – which I also explain how to use in this article.
https://createabetternetwork.com/6-promote-your-network/6-2-create-and-post-informational-videos
Practice to set the sound volume
In general, Simple Screen Recorder is very easy to use. The biggest problem you are likely to run into is that students voices may not be loud enough. Make sure your speaker volume is set to at least 100 percent before starting the recording. The instructor voice volume is set in Settings, Sound where it can be adjusted up or down. You also need to set the sound source in the first screen of Simple Screen Recorder for the actual microphone rather than for the monitor of the microphone. Ideally, the room you are recording in should also be as quiet as possible to avoid picking up background sounds.
Post video conference videos on your website
As we explain in detail on the above link, posting video conference videos to your website is a three step process. First, edit the video if needed. Second, post the video to a YouTube and/or BitChute channel. Third, use the Embed code to embed the video into a website page. The benefit of posting your video conference videos to your website is that it will allow members who were not able to attend the video conference event (as well as new members to your network) a chance to get caught up by watching a video of the event on your website.
Jitsi installed on a Private Server is the Most Secure Option
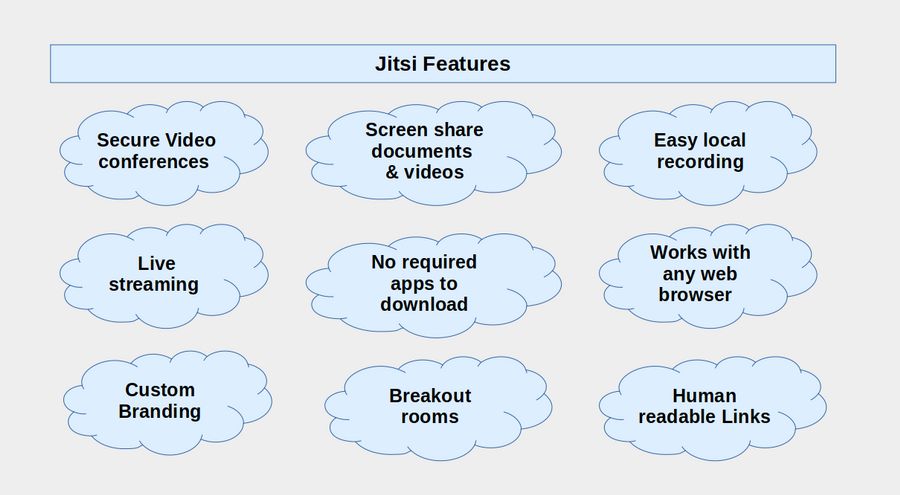
For years, Jitsi Meet has offered us a free, secure video conferencing alternative to Zoom. Jitsi Meet does not require attendees downloading any software. It works with any web browser. It can do screen sharing of documents, slideshows and videos. You can record your video conference with the push of a button and you can customize almost everything about it.
But requiring your video conference to be linked to a data mining corporation is a real deal killer for anyone concerned about privacy and security. Thankfully, there is a way to get all of the benefits of Jitsi without logging into a data mining corporation. This “best of all options” is to install Jitsi onto your own virtual private server. To see what this looks like, open any browser and go to this page:
Here you can see an example of a customized Jitsi Video Conference Welcome screen:
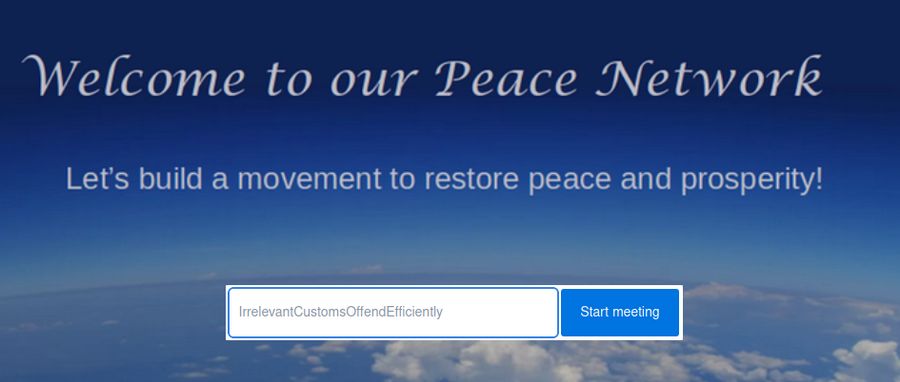
Type in Try-it-now and click Start meeting and then Allow. Then type in your first name and click Join meeting to see the Waiting for moderator screen. Click Login to see this screen:
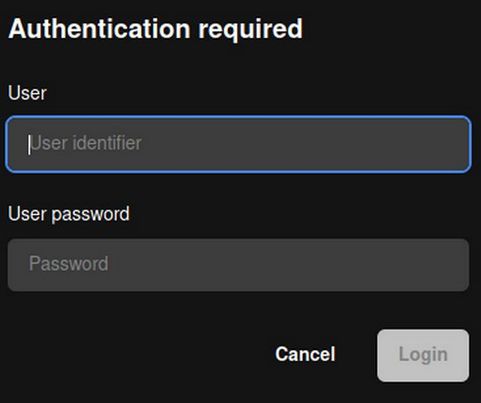
Instead of being forced to use a Data mining corporation to create a new meeting, you can create a series of accounts inside your server to allow your members to create secure meetings. Once created, anyone can be invited to these video conferences. So only conference creators need to be registered and even then their data is securely protected inside your own server.

In our next article, we will provide step by step instructions on how to set up your own secure video conferencing system using a version of Jitsi that can be placed inside of a Virtual Private Server (VPS) which is secure and entirely under your own control. While Jitsi itself is free, the process of video conferencing uses quite a bit of RAM. A VPS with 4 GB of RAM costs about $20 per month and can handle about 20 attendees. For $10 more, you can get a VPS with 8 GB of RAM which can handle about 40 attendees.
But what if you have a group with 100 or even 10,000 members? Jitsi does offer tools to expand your capacity to 10,000 attendees by linking together up to 100 servers. But the monthly fee for all of these servers will be very high – almost as expensive as Zoom! A less expensive option is to only invite those members who will be actually speaking to the video conference. Jitsi comes with a button to download a copy of the video conference to your Home computer – which you can then post online for those wanting to watch the video conference.
Jitsi also offers a way to “Live Stream” the video conference. This option will allow an unlimited number of people to watch online. If they have questions, they can email them to one of the moderators who can then post answers on a community forum.
What’s Next?
Now that we know why we should set up our own secure video conference system, let’s take a closer look at how.