3.1 Use Hestia to Install Freedica

It is really amazing that we now have the ability to create our own version of Facebook or Twitter with just the click of a few buttons. Setting up your own Freedica social network will give your group the security, freedom and privacy that simply does not exist on any platform controlled by billionaires.

How to Install Freedica with Hestia
One of our goals is to make installing a secure social network as easy as possible. In this article, we provide a way to install Freedica using our Hestia Control Panel which has been installed on a Debian virtual private server hosted by Canhost.ca.

Step 1 Set up a Secure Foundation
Most people use a Windows computer to go online. Sadly, the Windows operating system is extremely insecure and easy to hack – subjecting you and your social network to the risk of Windows Ransomware. To be clear, folks creating “member” accounts and using the Freedica Network with a Windows computer would not place the entire network at risk. They would only be placing their personal member account at risk. But is it essential that the person creating and administering the Freedica network only log into the back end of the network with a Linux computer. The good news is that most people have an older Windows computer in their closet. These can easily be converted into a secure Linux computer. We covered the process of converting a Windows computer to Linux Debian in article 2.1 in our previous chapter.

Step 2 Use a Secure ProtonMail Email address
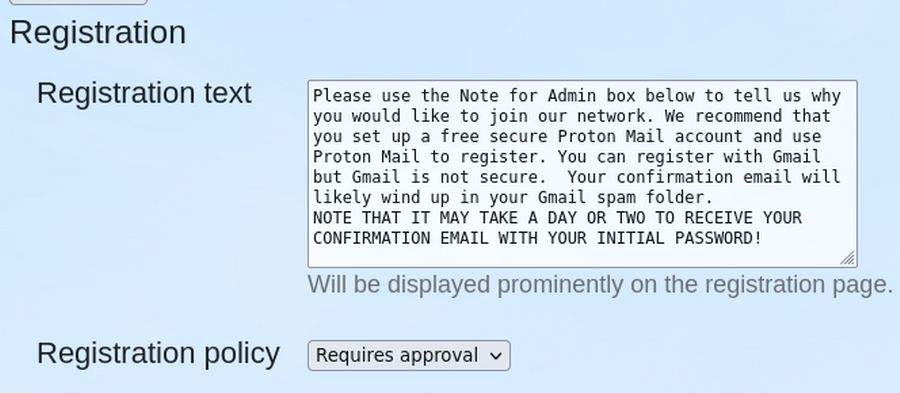
Do not use a Gmail address as it is not secure. You will be sent your initial password via email and it is therefore essential to use a secure Proton Mail email address. Also do not use a Windows computer to get your Proton Mail account as your Windows computer is simply not secure. Set up a Linux Laptop first. Then use your secure Linux laptop to get your secure Proton Mail account.

This tutorial assumes that you have connected your Linux Laptop to the Internet with an Ethernet cable and then used your Linux Laptop to get a secure Proton Mail account.

Step 3: Create an account at Canhost
To avoid being subject to the Draconian US Patriot Act, it is essential that this server be located outside of the US. The server and domain host needs to have an easy to use DNS manager so that we can easily control our network domain settings. This is why we recommend CanHost. To create a CanHost account, go to CanHost.ca and click Log in. Then click Signup. Use your secure Protonmail account to create your Canhost account.

Step 4 Use your CanHost account to get a new domain name hosted by CanHost to use for your VPS name server
While you can use any domain name, such as mynetwork.com - or subdomain name, such as friends.mynetwork.com, it is not possible to change the domain name later. Therefore give some thought to this question. In our example, we have obtained two primary domain names. The first is called Better Future Network dot com. The second is called Better Network dot us. Each domain name costs about $12 per year or $1 per month. However, you could use the same domain name for all three by using the subdomain ns1,yourwebsite.com for your server, yourwebsite.com for your Joomla website and a different sub-domain, for example, friends.yourwebsite.com for your social network. This will allow us to later create a number of sub-domains such washington.betternetwork.us. In order to eventually set up a statewide or national network of Freedica websites to provide folks with an alternative to Facebook and Twitter.

3.2 Freedica Network Configuration Steps

In our last article, we used the initial password to log into our Freedica network as the network administrator. We then added our Profile image. In this article, we will review some important initial configuration steps. Each of these steps only needs to be done once.

Step 1 Change your Admin password
Click on your image in the upper right corner to bring up the hidden Member menu.

01

Then click Setting.

02

Click Password Change. Type in your new password twice and your initial password once. Then click Save Settings. The Password Changed popup should appear.

Step 2 Review the initial queue information
Click Main Menu, Admin to go to your Freedica Admin screen.

03

The first number shown is the Retry queue – which will be retried. The second number shown is the Task queue which are tasks queued for the next background worker run.

Step 3 Change the Site Name and add site email
From the hidden menu, click on Admin, Site, General Information.

04

Change the site name from Freedica Social Network to Our Better Network. Then enter your network admin email address for the Sender email. In the boxes called Shortcut icon and Touch icon, type images/favicon.ico.

05

Then scroll down to just above the word Register and click Save Settings. This will now display a heart and your network name in the browser tab.

Step 4 Change the Site Style
Freedica has two types of pages. Some pages are Site pages which can only be altered by the network administrator. These pages include the Home Welcome page, the login page, the registration page and the pages reached by clicking on Admin in the main menu.

Member controlled pages include their Profile Home page, their Network page and their Community Page.

3.3 Customize the appearance of your network

In our last article, we set the Meadow style for the Site pages and the Sky style for the Member pages. But there is a problem. The banner for our Site Home page reads: “Welcome to our Spring Meadow Banner” Also the Text on our Home page reads “Welcome to our Freedica Network and has a brown background rather than a green background:

01

In this article, we will review how to change the banner and text to match the name of your network. We will then explain how to create your own theme using your own colors, text and background images.

Step 1 Change the Home page Title, Text and Color
Freedica includes five HTML files that make it easy to customize the home page. Log into your Hestia Control Panel and click on the User account. Then click Files, Web, your network domain, public_html. Rename the home.html as freedica-home.html. Then rename meadow-home.html as home.html.

Also rename home.css as freedica-home.css and meadow-home.css as home.css. Then clear the browser cache and reload the Home page.

02

To change the text of the Home page, just open and edit the home.html file.

3.4 Member Moderation

One of the most important features of Freedica is its Member Moderation system – which allows you as the network administrator to control who is allowed to join your social network. This system allows you to protect your members from harassment from bots and trolls so common on top-down social networks. In this article, we will explain how to use the Member Moderation system.

Member Moderation
In our previous article, we went to Admin, Site, General Information, Registration to change the registration system from Open to Requires approval. In addition, there is a box where you can customize the information at the top of your registration form explaining to new members what your network policies are for accepting new members. For example, you might only accept application from your own state. Or you may require new members to state an interest in a particular goal such as improving the economy. Here is what these Registration settings look like when you are logged in as the Network Administrator:

01

Change the text to match the needs and interests of your group. Then log out and view your Network Home page.

New Member Registration
One of the first challenges new members face is figuring out how to register. To help them get to the registration page, we provide two important clues. First, at the bottom of the text on the left side, it says to click LOGIN or click HERE to join!

02

Click on the word HERE to verify that this link goes directly to the Registration page. Then click on Home to go back to the Network Home page. Because many visual learners do not actually read text, the second important clue is just above the Welcome image:

03

If you create a new Welcome image, please keep this information at the top of your Welcome image. Click Login to see the Login form:

04

To create a new account, click Sign up now.

Here is the top of the default Freedica Registration form: