
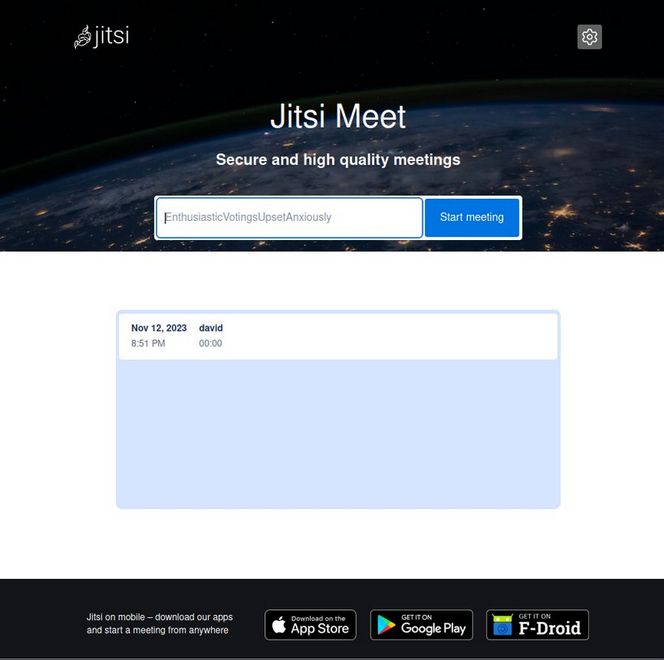
It is relatively easy to customize the appearance of the Jitsi Meet Welcome Page. Here is what the default Jitsi Meet Welcome Page looks like:
Right click on the top image to get this image link:
https://meet.peacenetwork.us/images/welcome-background.png
Here is what the top image looks like:

It is 1280px wide by 437px high.
Here is our replacement header with the same width and a height of 300px:

SSH into your server as root and type mc to open midnight commander. Click on the three dots to go to the root folder. Go to: /usr/share/jitsi-meet.
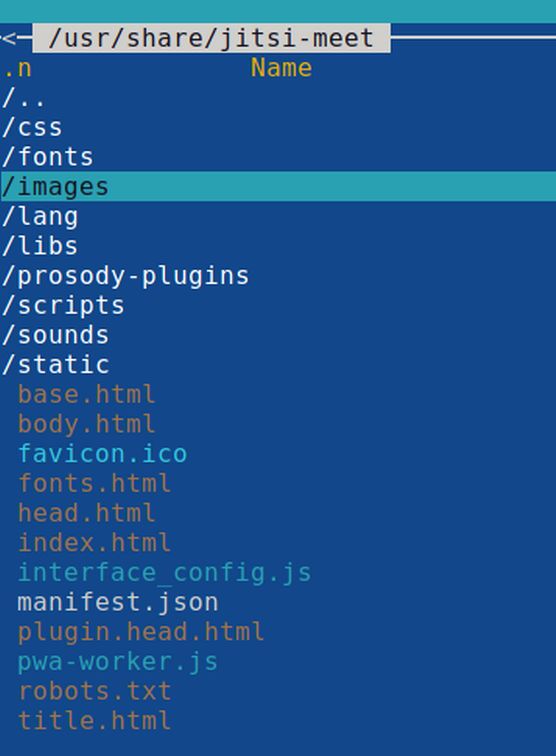
Click the /images folder to open it. We need to first rename the default welcome-background.png image as old-welcome-background.png
Close midnight commander with exit. Then use a Linux terminal command to rename the old file. First change the directory with this command:
cd /usr/share/jitsi-meet/images
Then use the mv command to rename the file.
mv [current file name] [new file name]
Here is the command to copy paste into the terminal:
mv welcome-background.png old-welcome-background.png
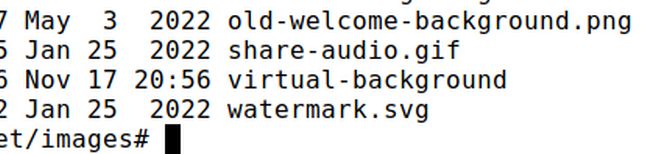
Since there is no output if the command is successful, we will use the ls command to check if the name is changed:
ls -l
Then type cd / to return to the root folder. Then in our home file manager, copy and rename our custom image welcome-background.png.
Use Midnight Commander to load the image to our server
Next is the tricky part. We need to copy the file from our home file manager to our server. We will use Midnight Commander to load the file to our server tmp folder. Open a new terminal on your desktop and type mc to open Midnight Commander Then click Left, SFTP Link. Type in your SSH root and IP address.
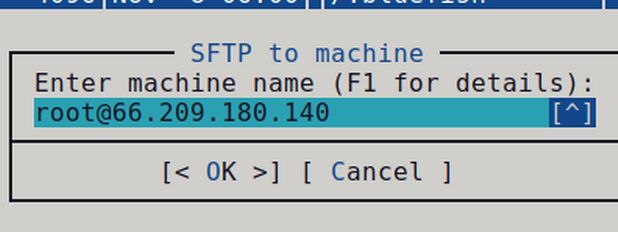
Then enter your root SSH password and press Enter.
Your home file manager now appears in the right panel and your server file manager appears in the left panel.
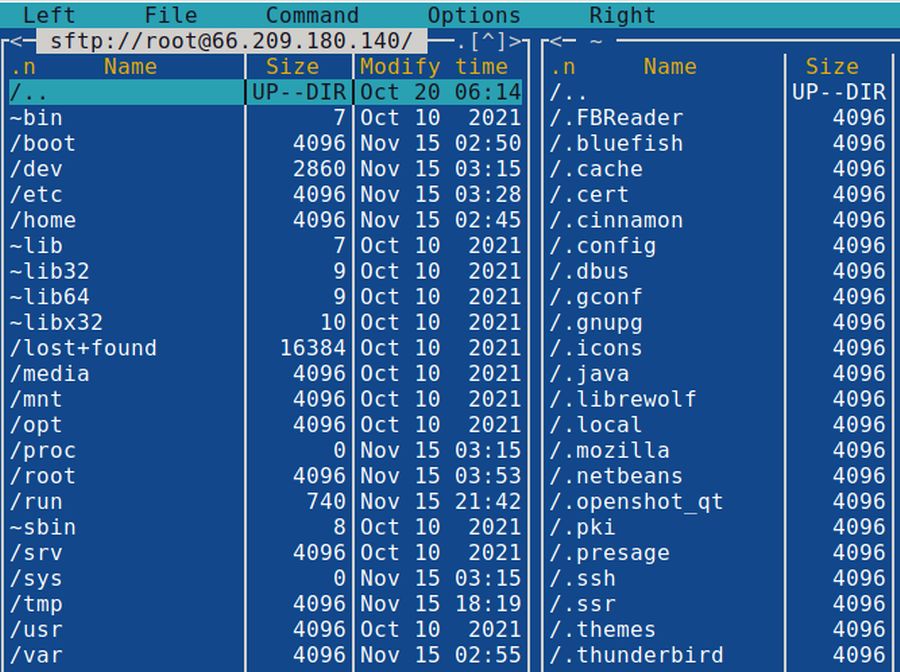
In the left panel, navigate to and open your jitsi-meet images folder. Then in the right panel, navigate to your file and select it. Then click File Copy.
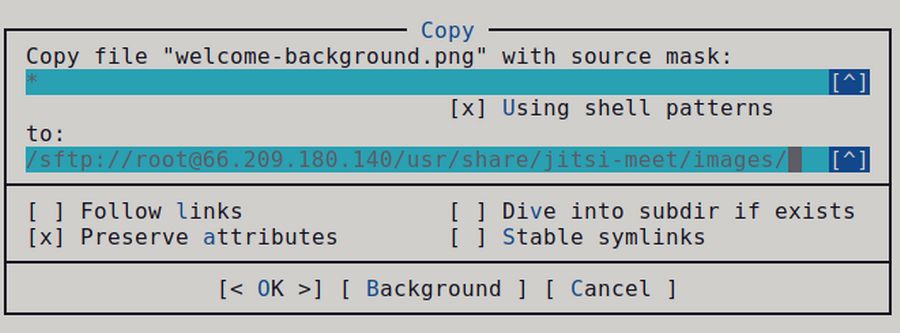
Then click OK. Then type exit to close your home terminal.
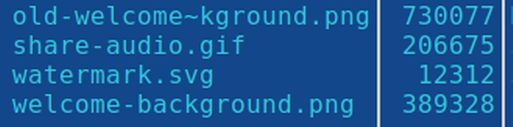
The new file is half the size of the old file meaning our Welcome page will load quicker.
Change your Welcome Page CSS
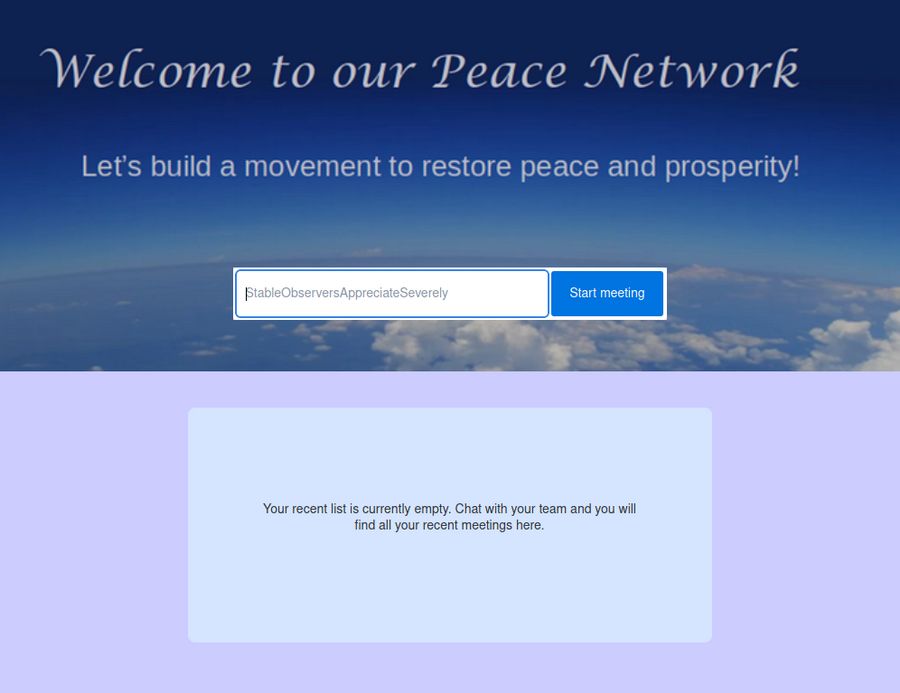
Open the css folder and the all.css file. Then scroll right to change the background color frome dbdbdb to aaccff. Then hide the Jitsi title and description by adding a new line. Then copy paste:
.header-text-title {display: none !important;}
.header-text-subtitle {display: none !important;}
.header-watermark-container {display: none !important;}
.welcome-watermark {display: none !important;}
.welcome-page-settings {display: none !important;}
.header { min-height: 200px; width: 100vw;}
.header-container { min-height: 300px; width: 100vw;}
.welcome { background-color: #ccf;}
#enter_room {background-color: #ddf; margin-top: 200px !important;}
Save and close the file. Go to your home page to view the result.
Remove the Jitsi watermark logo on video conference
Jitsi has a watermark logo in the top left corner of the video conference.

To hide this logo, start a root SSH session, turn on Midnight Commander. Then go to the file and click File Edit:
/usr/share/jitsi-meet/interface_config.js
Press Alt plus c to Turn on Line #’s and scroll down to Line 141. Change SHOW_JITSI_WATERMARK: true, from true to false.
Then save and close the file and type exit to close Midnight Commander. Then type exit to close the terminal.
Record your Jitsi Video Conference
There are often times when you will want to record your video conference sessions – for example when you are teaching a course and want to post a class session on a web page for students to watch who were not able to make it to the live class session. Jitsi comes with a local recording feature. It is limited to about 90 minutes – which is about the longest you would ever want to run a class session anyway. You can then start a new Jitsi session to record up to another 90 minutes. Unfortunately, this local recording button is hidden by default. To display the local recording button, start a root SSH session, turn on Midnight Commander. Then go to the file and click File Edit:
/etc/jitsi/meet/{domain}-config.js
Type Alt plus c to display Line numbers.
At Line 319 delete the two dashes in front of recording Service: {
At Line 324, delete the two dashes in front of enabled: false and change it to enabled: true.
At Line 333 delete the two dashes in front of },
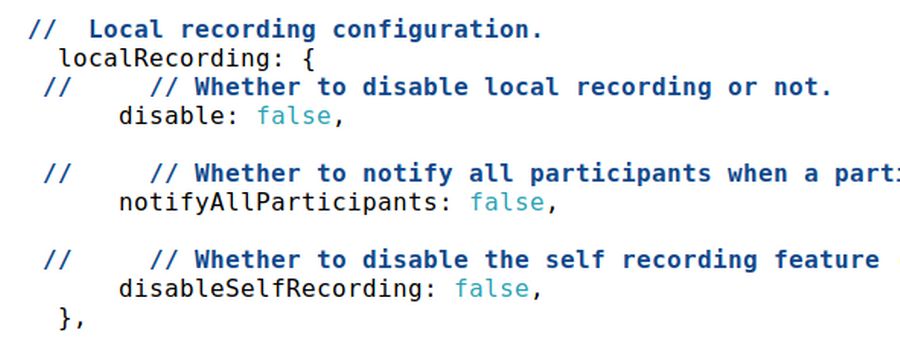
Line 342 to Line 351:
The default looks like this:
// localRecording: {
// Whether to disable local recording or not.
// disable: false,
Delete the double forward slash before local Recording and also delete the double forward slash before disable: false.
see below
Then save and close the file.
Test the result
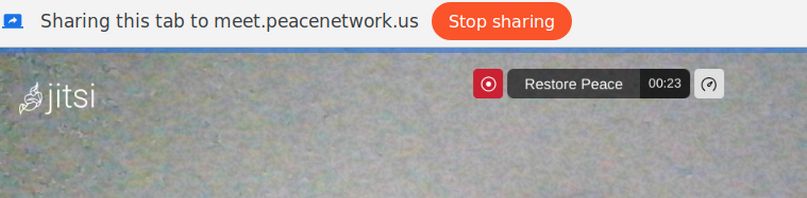
We need to use Brave browser or other Chromium based browser to record locally.
https://meet.peacenetwork.us/restore-peace
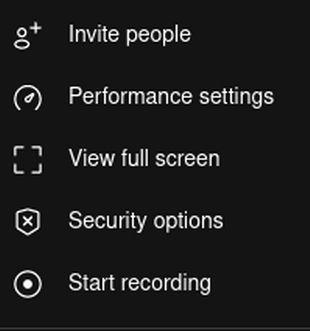
Go to more actions -> Start recording. Click on Save recording files locally After the meeting has ended or when you stop the recording, the recording file will be downloaded through the browser.
Switch to Tile View and then click Start Recording. You will see this popup when using Brave Browser:
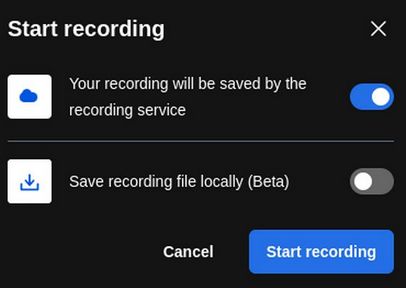
Toggle to Save recording file locally and click Start recording.
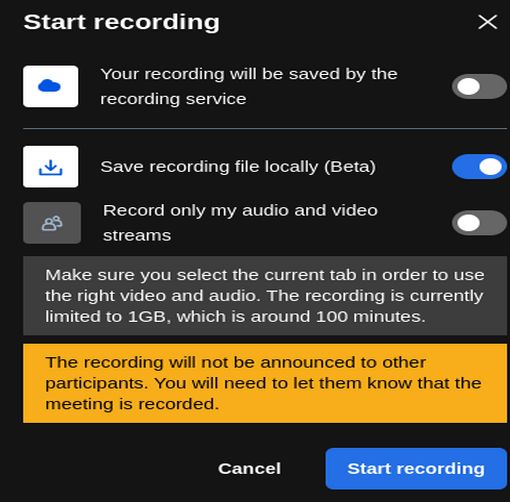
Then click Start recording. A Preview screen will appear. Click Allow. It will then start recording with a popup like this noting that you must stop the recording and save it before ending your video conference.
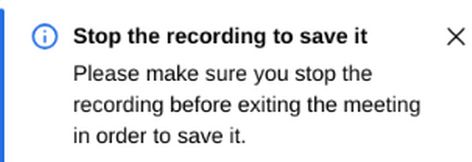
Close this popup. This notice will remain at the top of the screen. To stop recording, click the Stop sharing button.
A popup will appear allowing you to save the file to your Home computer File manager.
Hashed out Line 92 p2p test ode false
Jitsi remote Video Menu skip
Disable kick and enable the prejoin page
Set prejoinPageEnabled and disableKick to true in your config. Edit your /etc/jitsi/meet/[your-domain-name]-config.js
Turn on Line #s with alt plus c. Then scroll down to Line 1278
and uncomment the remoteVideoMenu section to make it look like this:
remoteVideoMenu: {
disableKick: true
}
Line 663
Uncomment // prejoinConfig
Then delete double forward slashes before enabled: true,
Then delete double forward slashes before },
: false, and change it to prejoinConfig: true,.
Then save and close the file and test the result.
https://meet.peacenetwork.us/test
Fix the low quality video warning
It is common to get this warning on a low powered VPS:
Jitsi Video Quality Impaired The bridge Channel has been disconnect and thus the video quality is limited to its lowest setting.
If you get a low quality video warning, the easiest solution is to disable Simulcast which is a process used by Jitsi to send four or five transmissions all at the same time and instead only send one video at a time: Line 280 delete double hash and change
disableSimulcast: false, to true.
What’s Next?
In our next chapter, we will take a closer look at how to promote open source projects.