The first step in assisting an Open Development project is learning some of the terms used by Open Development projects. The primary tool used to debug and improve Open Development code is called Git. In this article, we will explain Git terms as well as other terms used to develop and maintain an Open Development project.
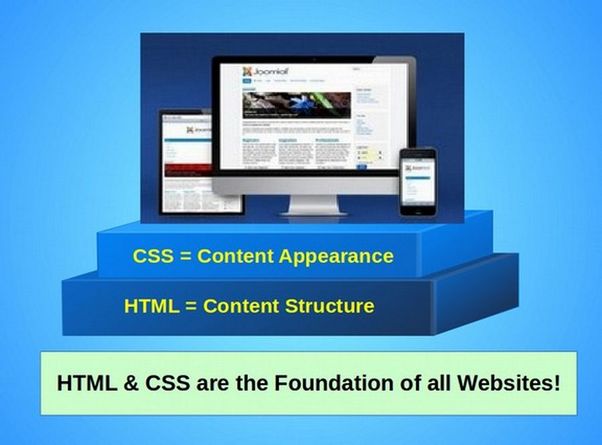
Important Website Building Terms… HTML, CSS and PHP
Most open development includes learning the basics of website building tools such as HTML, CSS and PHP. Joomla and Freedica and NextCloud are all a graphical interfaces for PHP, CSS and HTML. Here is a bit of history on these three web building tools.
In 1990, Tim Berners Lee created a free Open Source language called HTML (the Hyper Text Markup Language) to make prettier web pages. Prior to this, web pages were only plain text files. HTML uses opening and closing brackets to separate different website objects. Here is an example of HTML for a Heading (which tells a web browser to make this text bigger and bolder than normal text):
<h1> This is a Title </h1>
HTML made web pages look better. But HTML was not good at either precisely controlling the appearance of web pages or defining the relationships between objects. These problems were solved by the introduction of two new tools called CSS and PHP.
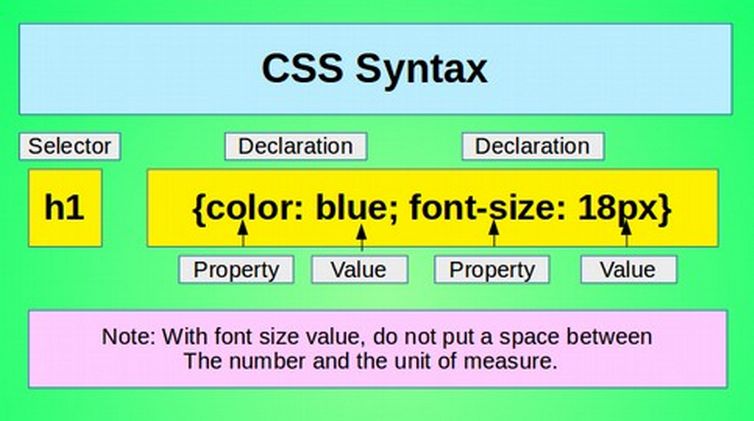
On October 10, 1994, a coworker of Tim Berners Lee named Hakon Wium Lie published the first draft of Cascading HTML Style Sheets. This later was shortened to just Cascading Style Sheets or CSS. CSS uses Selectors and Classes to style or better define the appearance of HTML elements. Today, nearly all websites include one or more CSS style sheets. The current version of CSS is CSS 3.
In 1995, Rasmas Lerdorf created a free Open Source language called PHP which expanded HTML to work with and manage a database. PHP is the most common database management program in the world and runs about 80% of all data base driven websites. The current version of PHP is version 8.1. Here is an example of PHP code which simply displays some HTML text:
<?php echo '<p>Hello World</p>'; ?>
The above code simply tells the browser to display the words Hello World. Notice that the HTML brackets are simply placed inside of the PHP brackets. The goal of PHP is to extend HTML so your website can ask questions, called queries and thus work with a database. This is why PHP uses question marks in addition to brackets.
Important Database Terms
A database is a collection of related data stored on a computer as a series of inter-related tables. This data is defined and manipulated by a program called SQL which stands for Structured Query Language. The most common databases today are Object Oriented databases and Distributed Databases.
Database Objects are pieces of data. Each object has a Name and a Value. For example, we could define a Name called My First Name. The values might be David, Sue, Tom, etc. This is similar to a Table or Spreadsheet. But instead of just storing a single table, a database contains many tables. Also the data stored in a database is stored in a way that each table of data can be related to other tables of data.
Distributed databases are databases stored in different computers that work together in a connected network. The most common databases today are called Maria databases.
Many modern website building programs, such as the Joomla Content Management System, store data in a database. Joomla is a free Open Source graphical interface for the PHP database management program. There are other types of languages and other types of databases. But to keep things simple, we will assume we are working with a Maria database controlled by a PHP program.
Important Git Terms
What is Git?
Git is a code revision process created by Linux Torvalds, the founder of Linux in 2005 to improve the code of the Linux kernel. Git is an open development decentralized revision control system.
Git uses Repositories for Open Development program projects. These repositories can be in a folder on your Home computer (called Local Development) or in a folder on a Remote Server such as Codeberg (called Remote Development).
A Repository is simply a place to store files or programs. For example, Debian has a repository to store thousands of free Open Source programs that work with the Debian operating system. When we go online to install a Debian program, we are simply downloading a copy of the program from the Debian repository.
The Git Object Repository
Git is a name/value database. Git stores pieces of data (values) in "objects" in such a way that each object is assigned a unique name. Each value is assigned a random string of 40 characters, called an SHA1 checksum. Here is an example of a checksum:
1da177e4c3f41524e886b7f1b8a0c1fc7321cac2
The same chunk of data always will have the same SHA1 checksum, which always will identify only that chunk of data. Git makes the names of objects unique by using the values to create the name. Each object's name is chosen automatically by its content's SHA1 checksum. Because object names are SHA1 checksums, they identify the object's content while being globally unique—not just to one repository, but to all repositories everywhere.
Instead of using normal revision numbers like Joomla 4.25, Linus Torvalds wanted each Linux revision to have a unique name - which is why he decided to use SHA1 checksums. The 40 digit number shown above was the ID number of Linus’s first commit to the Linux kernel git repository in 2005. The common name for this same version of the Linux kernel was version 2.6.12.
Four Types of Git Objects… Blobs, Trees, Commits and Tags
Git stores data in four types of objects - called blobs, trees, commits and tags. Each object has a unique SHA1 name and some content. The only difference between these four types of objects is the type of information they contain.
A blob stores the raw data content of a file. This is the simplest of the four object types.
A tree stores the files of a directory. A directory is simply a folder that has some files in it. If you have used a file manager, you know that a folder can contain other folders in addition to storing files.
A commit is a record of a set of changes introduced to a project. A commit associates a tree object—or version of a program—with information about it, such as who made the change and when, a description of the change, and its parent commit(s) or the source program that the change was made from. Because there actually is nothing special about the parent commit other than chronology, one commit can be compared to any other commit regardless of how many commits are in between. Commits usually have a single parent, but they will have more than one parent if they are the result of a merge (which is a combination of the commit or change with the master or original program).
A tag is an easier to remember named reference for an object—usually a commit. Tags typically are used to connect a particular version number with a commit. The 40-character SHA1 names of commits are impossible to remember. Tags solve this problem by letting you give an object an additional name such as Joomla 4.2.5.
The Importance of Version Control
Version control is a system that records changes to a file or set of files over time so that you can recall specific versions later and even revert back to a previous version if the new version turns out to have major problems. If you have a website and periodically make changes to it, you might create a backup of your website before and after each set of changes. Each backup would represent a different version of your website. A Version Control System (VCS) allows you to revert selected files back to a previous state, revert the entire project back to a previous state, compare changes over time, see who last modified something that might be causing a problem, who introduced an issue and when. Using a Version Control System allows you to easily return to a previous state if your program develops problems.
Local Version Control
Many people simply copy files into another folder with a date such as 2017 files or 2018 files and then place these old files on an external drive. There are programs that can help you determine the differences between these various versions of your programs… but it can become very challenging to tell different versions apart.
Centralized Version Control
A major issue with software development is that software is often developed by a team of people who need to collaborate with other members of their team – each of which may create a different version of the same program. To deal with this problem, Centralized Version Control Systems were developed. These systems have a single server that contains all the versioned files. Team members check out files from that central place. Prior to Linus creating GIT, this was the standard version control system for software development.
However, there is a major problem with centralized version control is that it creates a single point of failure. If that central server goes down for an hour, then during that hour nobody can collaborate at all or save versioned changes to anything they are working on. If the hard disk the central database is on becomes corrupted, and proper backups haven’t been kept, you lose everything.
Distributed Version Control… GIT
The desire to keep track of versions without a centralized system led Linus Torvalds to create a Distributed Version Control System he called GIT. GIT stands for many things. One of those things is the Global Information Tracker.
GIT is a fully distributed Version Control System meaning that every person has a complete copy of all versions of the code on their computer.
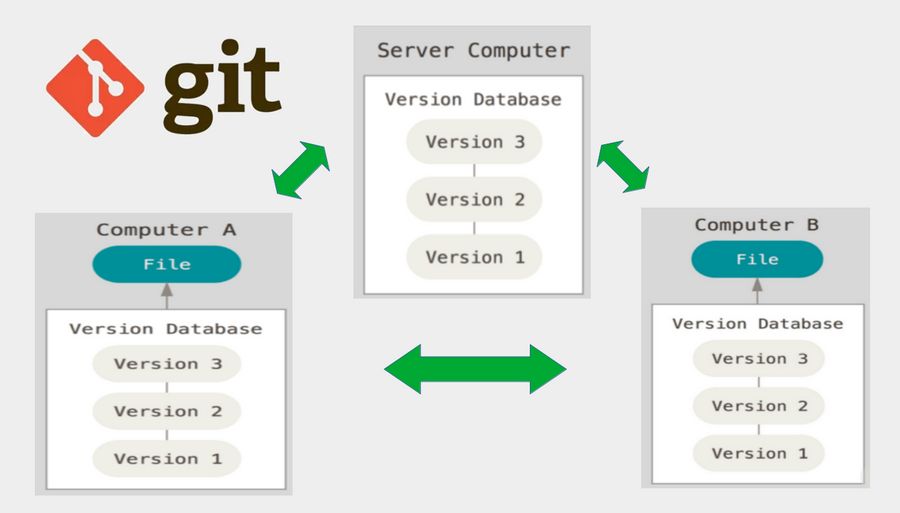
Every team member has a complete copy of all the data in the program. With Git, every time you commit, or save the state of your project, Git takes a snapshot of what all your files look like at that moment and stores a reference to that snapshot. To be efficient, if files have not changed, Git doesn’t store the file again, just a link to the previous identical file it has already stored. Thus, with Git, versions become a stream of snapshots.
Nearly Every Operation Is Local
Most operations in Git need only local files to operate — no information is needed from another computer or from another team member. For example, to browse the history of the project, Git doesn’t need to go out to the remote server to get the history and display it for you — it simply reads it directly from your local database. If you want to see the changes introduced between the current version of a file and the file a month ago, Git can look up the file a month ago and do a local difference calculation, instead of having to ask a remote server to do it. This also means that there is very little you can’t do if you’re offline. If you want to do a little work, you can commit happily (to your local copy,) until you get to a network connection to upload.
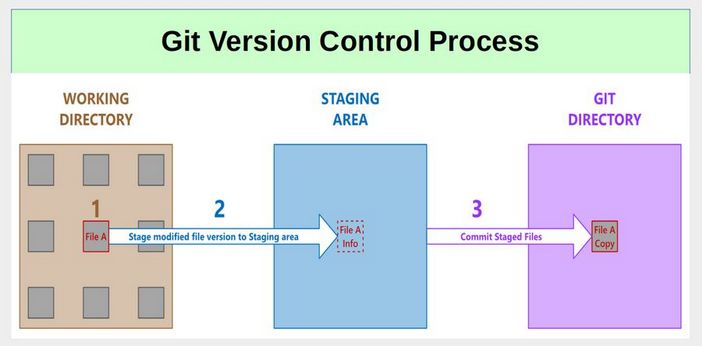
The Three States… Modify, Staged and Committed
Git has three main states your files can reside in: modified, staged, and committed. Modified means that you have changed the file but have not committed it to your database yet. Staged means you have marked a modified file in its current version to go into your next commit snapshot. Committed means that the data is safely stored in your local database. This leads us to the three main sections of a Git project: the working tree, the staging area, and the Git directory.
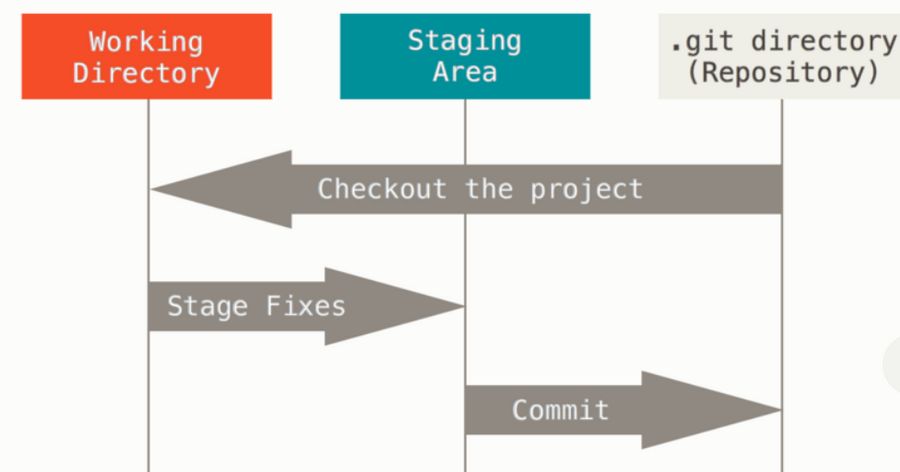
The working tree is a single checkout of one version of the project. These files are pulled out of the compressed database in the Git directory and placed on disk for you to use or modify.
The staging area is a file, generally contained in your Git directory, that stores information about what will go into your next commit. Its technical name in Git parlance is the “index”, but the phrase “staging area” is the common term.
The Git directory is where Git stores the metadata and object database for your project. This is the most important part of Git, and it is what is copied when you clone a repository from another computer.
The Git Workflow
The Git workflow goes like this… First, you modify files in your working tree. Second, you selectively stage just those changes you want to be part of your next commit, which adds only those changes to the staging area. Third, you do a commit, which takes the files in the staging area and stores that snapshot permanently to your Git directory.
If a particular version of a file is in the Git directory, it’s considered committed. If it has been modified and was added to the staging area, it is staged. And if it was changed since it was checked out but has not been staged, it is modified.
Open Source Development Tools
Now that we have a better understanding of Git terminology, let’s look at how to set up and use some important Open development tools. These steps include setting up a secure Linux computer, getting a secure Proton Mail Email address and then setting up a free project account on Codeberg.
Step 1… Use a Linux Computer
It is important to think about security from the very beginning of any Open Source project. It is important that open source projects be developed using open source tools. Ironically, many supporters of Open Source are using closed source computers such as Windows or Apple computers. These computers have known back doors that make your project vulnerable to hacker attacks. Your first step into Open Source development should be to convert an existing computer to the Linux operating system.
Step 2… Get a Secure Protonmail Email Address
A second important security step to create a secure Open Source project is to get a secure project-related email address. Sadly. many folks use Gmail which does data mining and therefore has known back doors which can be used by hackers to compromise your Open Source project. Proton Mail offers free email accounts that do not involve data mining and are therefore much more secure than Gmail. A free Proton Mail account also includes a free Calendar and a free Proton Drive folder to store and sync up to 1 GB of data. To get a free Proton Mail Email address, go to https://proton.me/
Click Create a free account. Then click Get Proton for free. Change the drop down from at proton.me to at protonmail.com. Use your personal name or project name for the username. Then type in a strong password. Then click Create account. For Display name, click Next. Then add a Recovery email address. Then click Save selected. For Welcome, click Next. Then select a theme and click Next.
Then click Get Started. Click the Settings wheel in the upper right corner. Then click Go to Settings to customize your settings. Then click New Message to send an email to another email account and verity that your email is working.
Step 3… Use your Proton Mail Account to set up a Codeberg Account
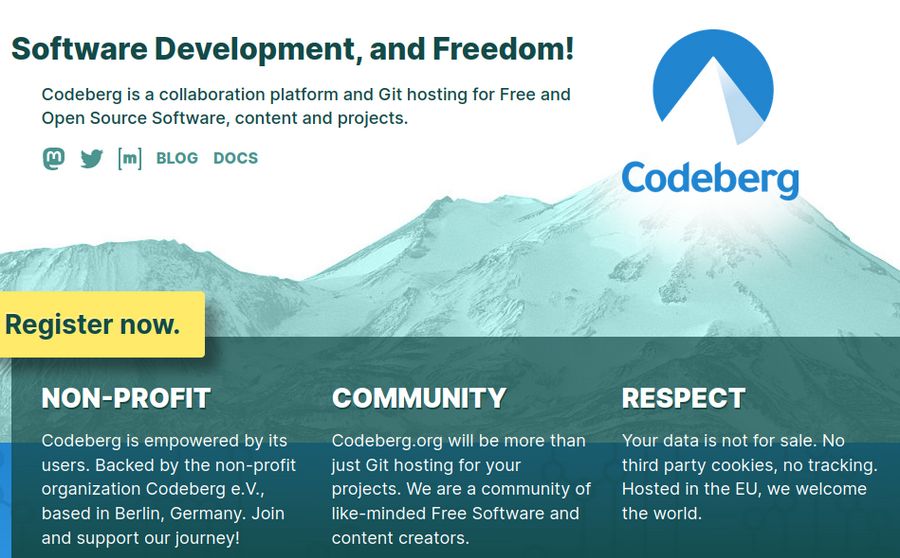
Codeberg is a non-profit remote Git Repository started in 2019 and located on servers in Germany. Codeberg was founded to support Free and Open Source (FOSS) code and content development. We support the open source community and aim to make the Free and Open Source movement stronger. Codeberg currently hosts about 50,000 projects created by 40,000 members.
Codeberg is built using a free open source program called Gitea. Unfortunately, in October 2022, a for-profit company called Gitea LTD took over the Gitea project (which was hosted on GitHub). In response, on December 15, 2022, members of the Gitea community forked Gitea and moved the forked project hosting to Codeberg under the new name Forgejo.
The Forgejo project has two major objectives. First, the community is in control, and ensures we develop to address community needs. Second, we will help liberate software development from the shackles of proprietary tools. Forgejo will provide a healthy project governance, so that it can truly focus on the needs of all those people that use our software on a daily basis. Forgejo’s vision is to make software development accessible to everyone. The Codeberg community immediately decided to switch from using Gitea to using Forgejo. Both Codeberg and Forgejo are committed to using exclusively free open source software tools.
After you have your secure Proton mail project account, you are ready to create your project Codeberg account. Go to:
https://codeberg.org/
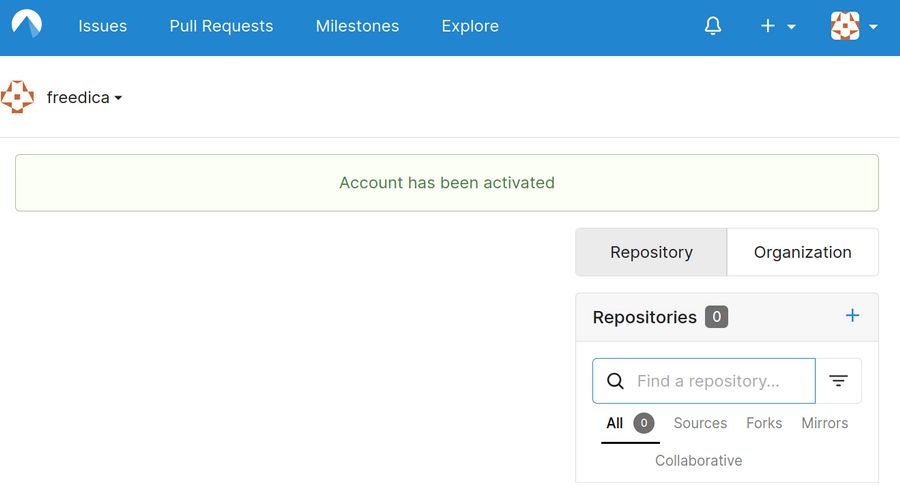
Then click Register Now. Use your project name as your username with lowercase and no spaces. Note that your username can not have underscores, but it can have dashes. Then enter your secure Proton Mail project based email address. Then enter a password. Then click Register Account. Within minutes, you will get a confirmation email with an Activation code. Click on the link. Then enter your password. This will open your account dashboard.
Click on the Organizations button in the lower right corner. Then click the Plus sign to the right of My Organizations.
Create a Project Organization
This is the new organization screen.
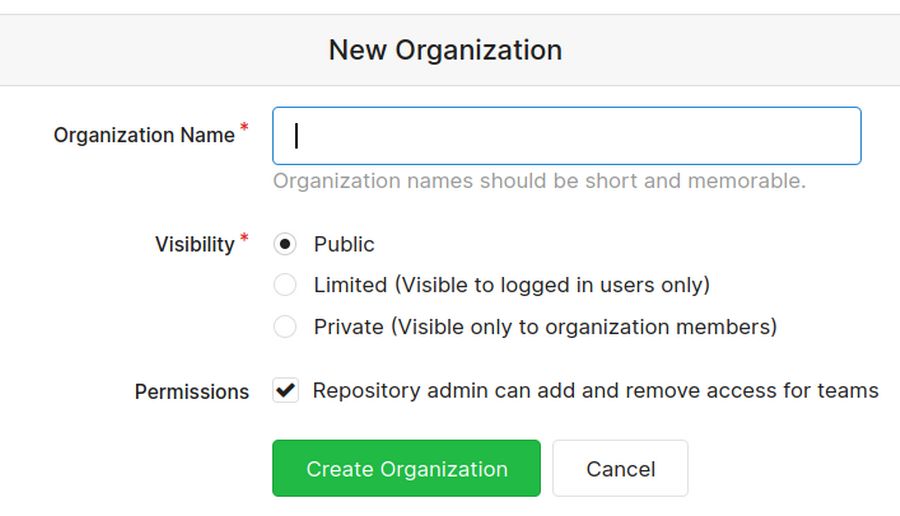
The Project Organization name has to be different from the project name. The name of your Organization should use underscores or dashes instead of spaces. The reason to create an organization is so that more than one person can have shared access to the organization repository. Each organization can have several teams – each with different access rights. We will therefore use the name Freedica-Friends. Then click Create Organization.
This will open an Organization page:
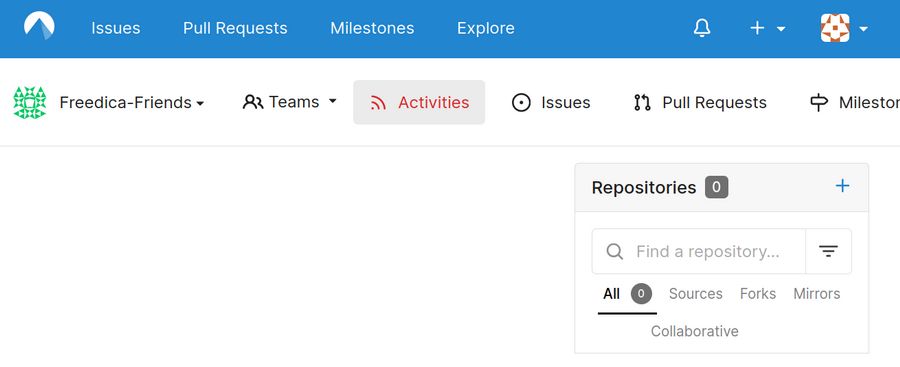
Add a new repository to your organization.
Click on the plus sign to the right of the word Repositories (0). This screen will appear.
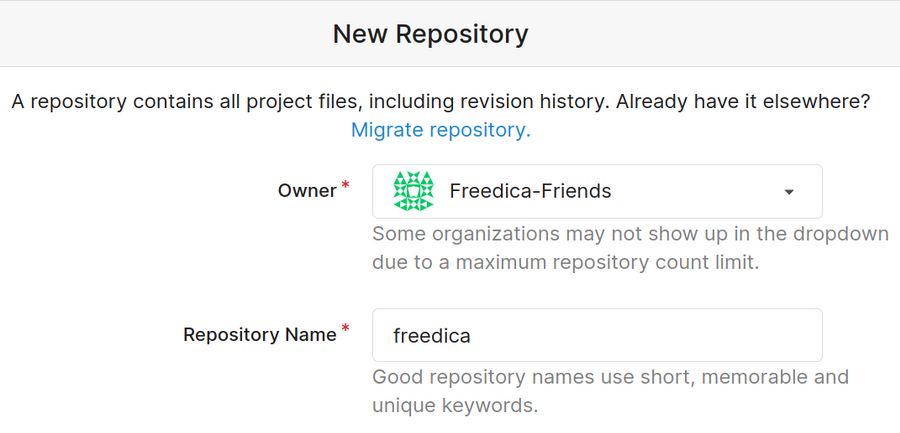
Use the drop down to assign the repository to your organization. Give the repository a short name as it will be part of the repository URL. In our case, it was freedica. Give the repository a one sentence description. Skip the template. Choose issue labels later. Create gitignore later. For License, choose GPL 3 or later.
README is the Home page for your project. We will fill it in later. Check the box to add the Project default README and License files. Leave the Make template box unchecked. After filling out the fields, click the green "Create Repository" button on the bottom of the page. You should now see a screen similar to the one below.
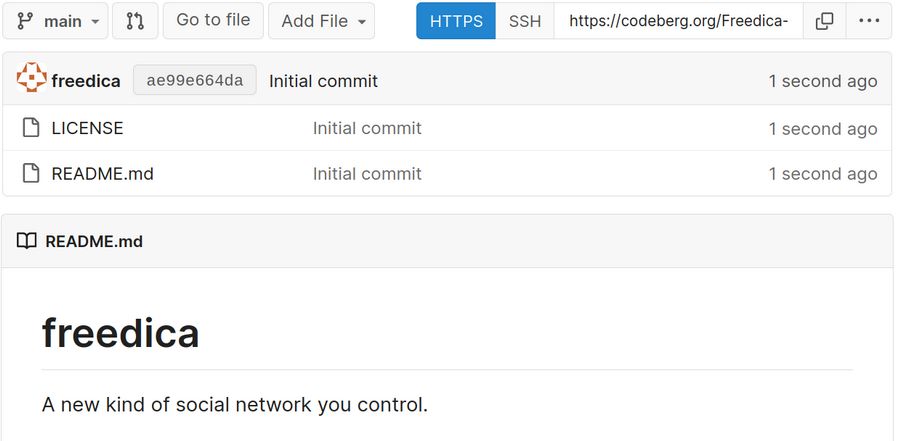
Note that main is set as the default branch.
Click the README file to edit it. Then click the Edit pencil.
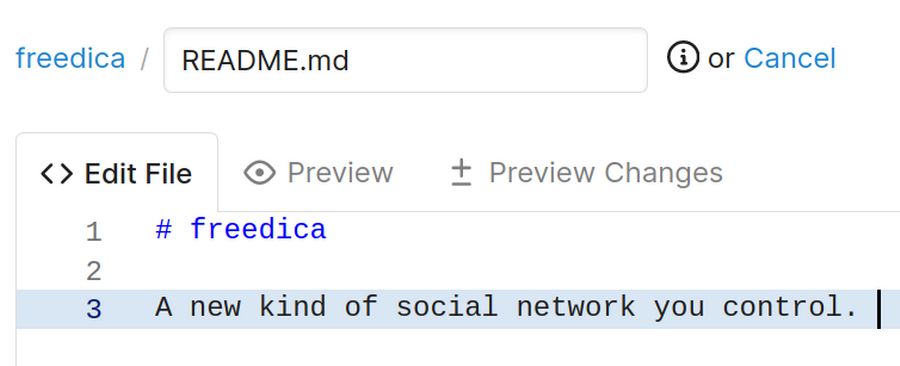
Enter a new line and copy and paste (with Control plus V):
This is the README file for our Freedica Project Repository.
We will add more information about this project later when we get more time.
Then scroll to the bottom of the page and click Commit Changes.
Then click on freedica to return to the repository page. For more on setting up your project organization, see this instructional page:
https://docs.codeberg.org/collaborating/create-organization/
Add a Codeberg Project Web Page
Codeberg Pages allows you to publish static website pages with a human-friendly address ({username}.codeberg.page. Follow these steps to get started.
#1… Create a new public repository named 'pages' in either your user account or your organization account. We will add the page to our organization account so that more than one person can edit the page. Click Freedica Friends in the upper left corner. Then click New Repository. For Description, type: This is our public page for Freedica Friends. Add the GPL 3 and later license and leave the Default README file. Also leave Initialize Repository selected and click Create Repository.
#2 Create a new file called index.html
Click Add file. New File. Name the file index dot html. Then copy paste
<!DOCTYPE html>
<html><head>
<meta charset="utf-8" />
<title>Freedica Friends</title>
</head>
<body>
<h1>Home Page for Freedica Friends</h1>
<p>This is the home page for Freedica Friends. We will add more content in the near future!</p>
</body></html>
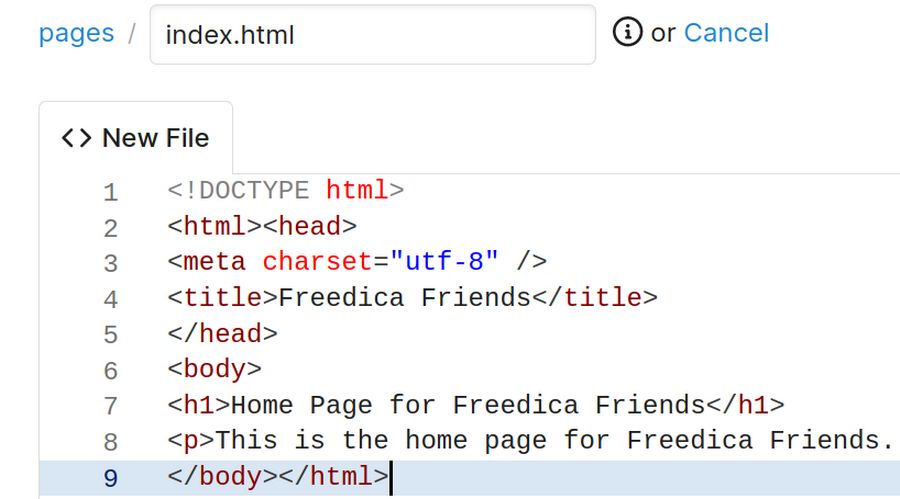
Then click Commit New File at the bottom of the page.
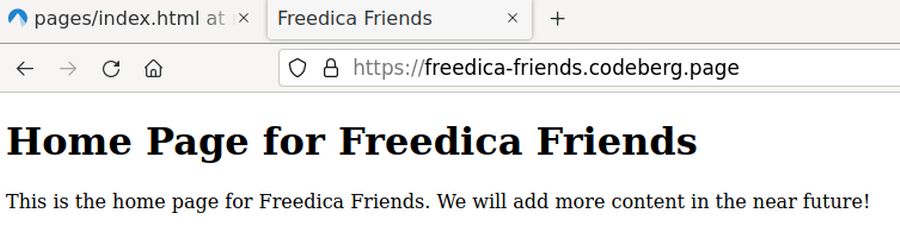
#3 View your new page by visiting {username}.codeberg.page or {organization-name}codeberg.page. In our case, the link to the page was https://freedica-friends.codeberg.page/
It could take up to 5 minutes to for Codeberg to activate and publish your new page.
Import your Codeberg Remote Repository to your Local Git Projects folder with Git Cola
From your organization repository code page, click the Copy URL button which is just to the left of the download arrow:
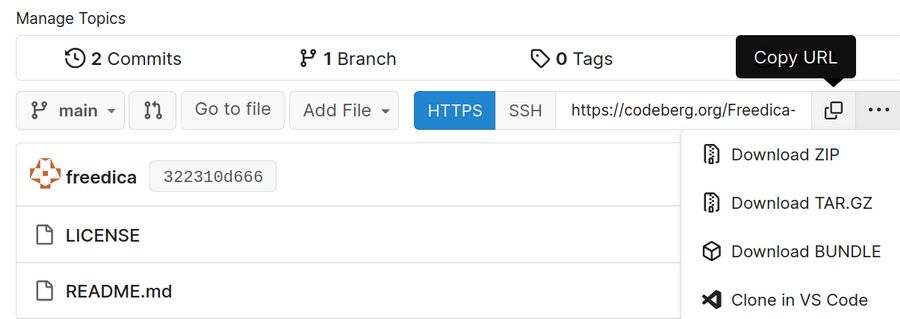
Here is the URL for our Freedica project Codeberg repository:
https://codeberg.org/Freedica-Friends/freedica.git
Note that the URL consists of the Codeberg domain name followed by your User name or Organization Name, followed by the name of your repository followed by the word git.
What’s Next?
Now that we have a basic understanding of how to set up an organizational repository on Codeberg, in the next article, we will review how to use Git Cola to connect your Codeberg organizational repository to your personal computer so that you can make code changes offline aka locally and then import them to your Codeberg project remote repository.