
Freedica Help articles are included with your installation of Freedica. In this article, we will explain where to find these Help articles and how to edit them to match the needs of your particular network.
Helping your Members Connect to Help Articles on the Front End of your Network
After a person successfully registers for a Freedica Network, they are taken to our Welcome article which explains what will happen after their registration is approved. This Welcome article and several additional Help articles can also be reached by clicking on the Question mark in the upper right corner of the Network Home Page:
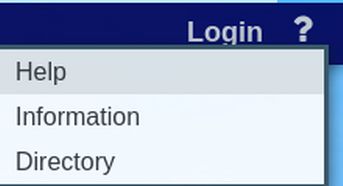
Information leads to information about the network. Directory leads to a searchable list of all of the members. Click Help to reach this page:
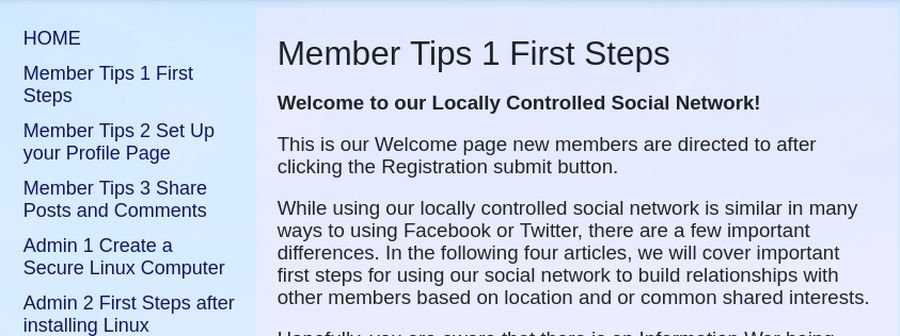
There are three Help articles for members. The Welcome article is called First Steps and explains how to create a Profile image and change the initial password. The second explains how to set up their member profile page. The third explains how to share posts and make friends.
There are also 8 Help articles for Administrators explaining how to securely install Freedica on a Virtual Private server and how to manage the network over time.
Location of Help Articles on the back end
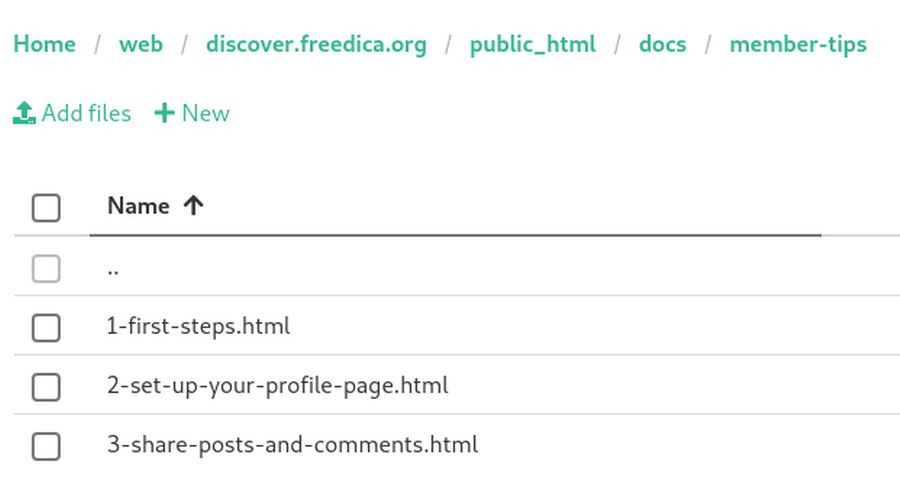
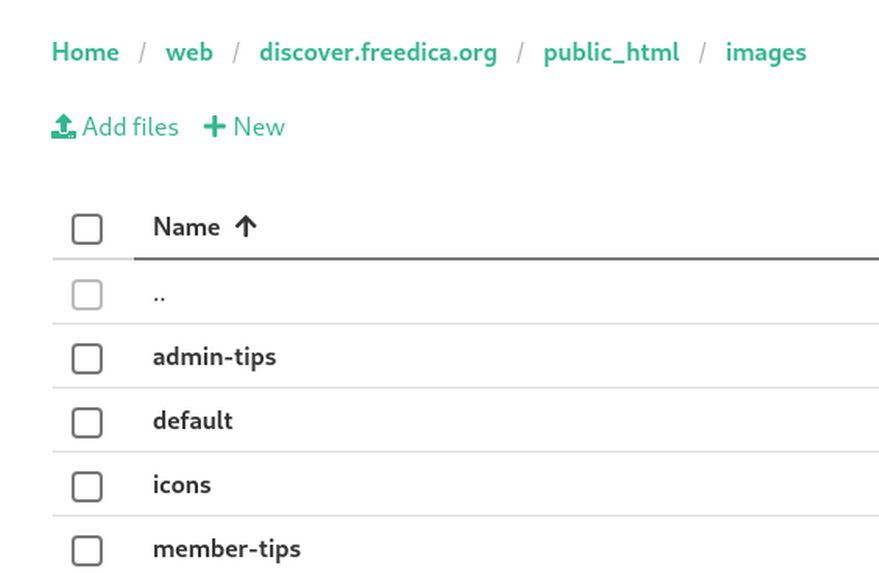
To edit or change any of our Help articles, you need to log into your Hestia Control panel and click on the Freedica user to go to the user panel. Then click on Files and go to the public_html folder for your network and click on the docs folder. Here you will find all of our Help articles divided into folders called member-tips and admin-tips.
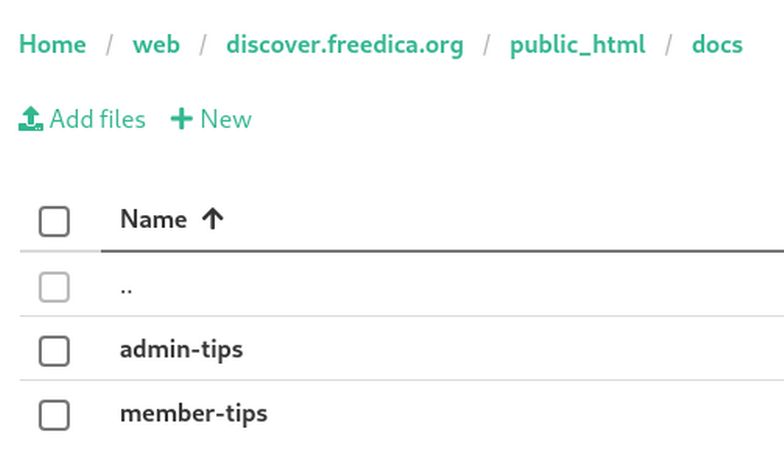
There are 3 html files in the member-tips folder and 8 html files in the admin-tips folder.
All 11 files have images in the top level images folder in folders called admin-tips and member-tips.
Changing Registration Success Redirect URL
To change the Registration success Redirect URL, go to source/module/Register.php line 396.
DI::baseUrl()->redirect('help/member-tips/1-first-steps.html');
Just change the path to your custom html file.
In addition, go to source/module/Help.php, Line 59
$text = self::loadDocFile('docs/' . $path . '.html', $lang);
(which defines the path as the docs folder) and Line 63:
$home = self::loadDocFile('docs/member-tips/1-first-steps.html', $lang);
which defines the file to load when a member clicks Help to be the 1-first-steps.html file.
Benefit of HTML over Mark Down Files
Sadly, it is common for traditional open source projects to use Mark Down files instead of HTML files for documentation articles. The benefit of Markdown is that it is slightly quicker to write documentation in Markdown than in HTML. However, it is harder to include images with Markdown. Thus it is common for traditional documentation to have almost no images.
One of the goals of the Freedica project is to include easier to follow instructions. To accomplish this goal, our 11 instructional articles include nearly 200 images. Images are an important reason to use HTML. In addition, we have previously created all 11 of our instructional articles as Libre Writer documents. We then created “web” versions of our Writer documents, replacing the images with placeholder text.
Next, we loaded the images for each article in its own folder using the Joomla Media Manager. We copied the web or text-only version of each article into a new Joomla article using the Joomla article manager.
Finally, we deleted the image placeholder text and added the images back with the JCE editor. The result is that we already have our html documents. Go to any of our Joomla articles on the front end of our website. Then right click and click View Page Source. Scroll down to about Line 116 to see a series of paragraph tags. Just copy these tags. Then open the Bluefish HTML editor and paste the HTML into a new HTML document between the opening and closing body tags. This will allow us to create 11 HTML documents that exactly match the 11 instructional articles we have already posted on our Joomla website.
The benefit of including these articles inside of Freedica is to make it easier for you to edit these files to create your own custom Help documents. Learning and using HTML is important because HTML is the language of the Internet. If you are new to HTML, we have created a course to help you learn HTML using the Bluefish editor. Here is the link: https://learnhtmlandcss.com/
Steps to Convert Joomla Articles to Freedica HTML Files
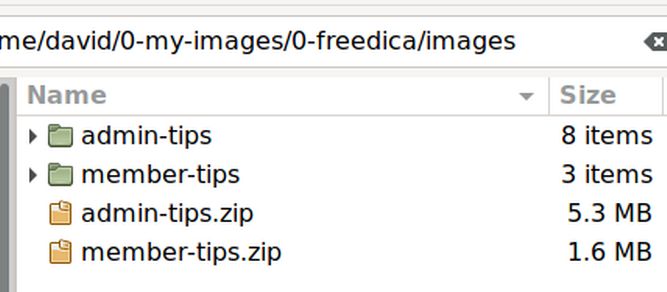
Step 1: Compress the Images folders on your Home Computer to create zipped files
Assuming the image folder and file names on our Home File Manager are the name as the folder and file names on our Joomla Media Manager, right click on the admin-tips images folder and click Compress. Then save the file as a zipped file. Repeat with the member-tips images folder. Here is the result:
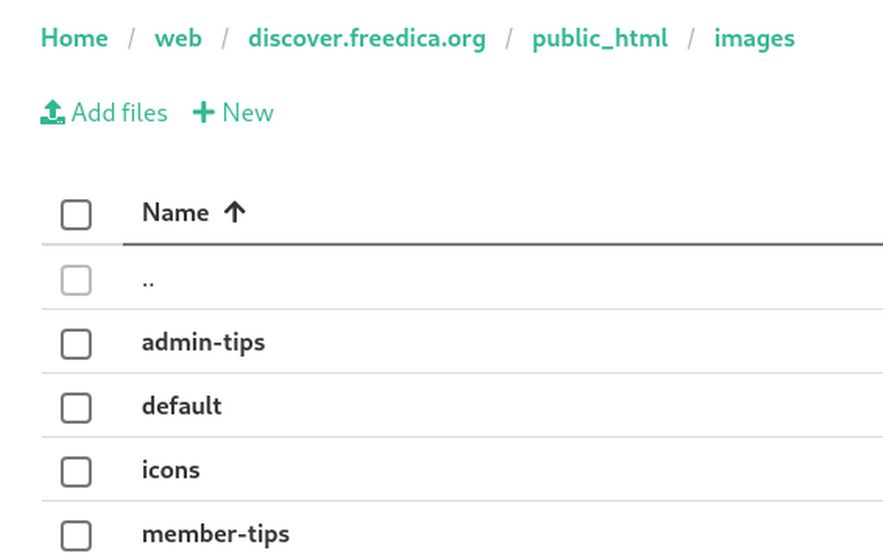
Step 2 Use the Hestia File Manager to add the admin-tips and member-tips zipped files to the top-level images folder
Then unzip each images folder. Then delete the two zipped images files. Here is the result:
Step 3 Go to your Joomla network website and right click on the first article – then click Edit Source.
Scroll down to Line 116 and copy starting at the line that begins with the word Welcome. Copy through the closing divide on Line 165. Then open the Bluefish HTML editor and paste this into a new html file. Enter two new lines below the body opening tag. At the second line, type <div>. This will match the closing div tag at the end of the article.
At the first line, click H1 in the Bluefish Editor tool bar to enter an opening and closing H1 tag. Between the brackets, type: Member Tips 1 First Steps. Also copy paste this between the title tags. Then click File, Save and save it as 1-first-steps.html
Then add this file with the Hestia File Manager to the docs/member-tips folder. To make sure that the html file and images were loaded correctly, open a browser tab and visit this page:
https://discover.freedica.org/docs/member-tips/1-first-steps.html
We repeated the HTML file creation process to create the other 10 other HTML files. 3 of these HTML files were loaded into the member-tips folder and 8 were loaded into the admin tips folder.
Create a side menu for each HTML file
Once we have our 11 Help documents, we need to add a side menu to each document so that members can move from one Help document to any other Help document they are interested in reading. We could use a top menu. But because there are 11 documents, we will use a side menu.
Adding a side menu to an HTML document is basically three steps:
Step 1: Add a CSS style section to the head area of each document.
Step 2: Add the menu item links to the body area of the HTML file.
Step 3: Place the content H1 divide and the main content divide inside of a divide with a class called main.
Step 1: Here is the CSS we add to the head of each document:
<style>
body {background-color: #ddeeff;}
.sidenav { height: 100%; width: 240px;
position: absolute; z-index: 1;
top: 20px; left: 0;
background-color: #def;
overflow-x: hidden; padding-top: 20px;}
.sidenav a {
padding: 6px 6px 6px 32px;
text-decoration: none;
font-size: 18px; color: #000055;
display: block;}
.sidenav a:hover { color: #000099;}
.main { margin-left: 240px; background-color: #eeeeff; max-width: 800px; padding: 20px;}
</style>
Step 2: Here is the link section we add inside the body with relative links to each of the pages:
<div class="sidenav">
<a href="//">HOME</a>
<a href="//docs/member-tips/1-first-steps.html">Member Tips 1 First Steps</a>
<a href="/docs/member-tips/2-set-up-your-profile-page.html">Member Tips 2 Set Up your Profile Page</a>
<a href="//docs/member-tips/3-share-posts-and-comments.html">Member Tips 3 Share Posts and Comments</a>
<a href="//docs/admin-tips/admin-1-create-a-secure-linux-computer.html">Admin 1 Create a Secure Linux Computer</a>
<a href="//docs/admin-tips/admin-2-first-steps-after-installing-linux.html">Admin 2 First Steps after installing Linux</a>
<a href="//docs/admin-tips/admin-3-create-your-own-vps.html">Admin 3 Create Your Own VPS</a>
<a href="//docs/admin-tips/admin-4-use-midnight-commander-to-change-vps-settings.html">Admin 4 Use Midnight Commander to Change VPS Settings</a>
<a href="//docs/admin-tips/admin-5-use-hestia-to-install-freedica.html">Admin 5 Use Hestia to Install Freedica</a>
<a href="//docs/admin-tips/admin-6-network-configuration-steps.html">Admin 6 Network Configuration Steps</a>
<a href="//docs/admin-tips/admin-7-customize-your-network-appearance.html">Admin 7 Customize your network appearance</a>
<a href="//docs/admin-tips/admin-8-member-moderation.html">Admin 8 Member Moderation</a>
</div>
Step 3: Here is the tag we will add above the main content:
<div class="main">
Here is the tag we will add below the main content:
</div>
Help document side menu creation process
Open the first html file with Bluefish. Below the title, create a new line.
Then copy paste the style section from Step 1.
Then enter a new line below <body> and copy paste the links section above from Step 2. Then enter a new line above <h1>. Copy paste the divide with class equals main from Step 3. Then scroll to the bottom of the content and just above </body>, enter a </div> tag.
Then save the file and use the Hestia File Manager to replace the existing html file. Then view the result.
08
Repeat to add side menus to the other other 10 html files.
Improving Help articles over time
We intend to improve our Welcome articles over time using feedback from our Freedica forum and emails from users with questions. If you have suggestions or would like to help with improving our Help articles, send us an email.